> For the complete documentation index, see [llms.txt](https://staylime.com/docs/llms.txt). Markdown versions of documentation pages are available by appending `.md` to page URLs; this page is available as [Markdown](https://staylime.com/docs/volume-themes/products/linked-products.md).
# Linked Products
Connect separate products and display them as clickable color swatches on the product page. Each color gets its own product card on Collection pages.
Some merchants choose to set up each color as a separate product instead of using Shopify variants — for example, to show individual product cards per color on Collection pages or to keep product galleries clean. Linked Products connects these separate products and displays them as switchable swatches on the product page.
{% hint style="success" icon="sparkles" %}
**Note:** If your colors exist as variants within a single product, Linked Products is not the right feature for you. Linked Products requires each color to be a separate product in your catalog — this is a significant catalog restructuring, so consider it before getting started.
{% endhint %}
***
{% stepper %}
{% step %}
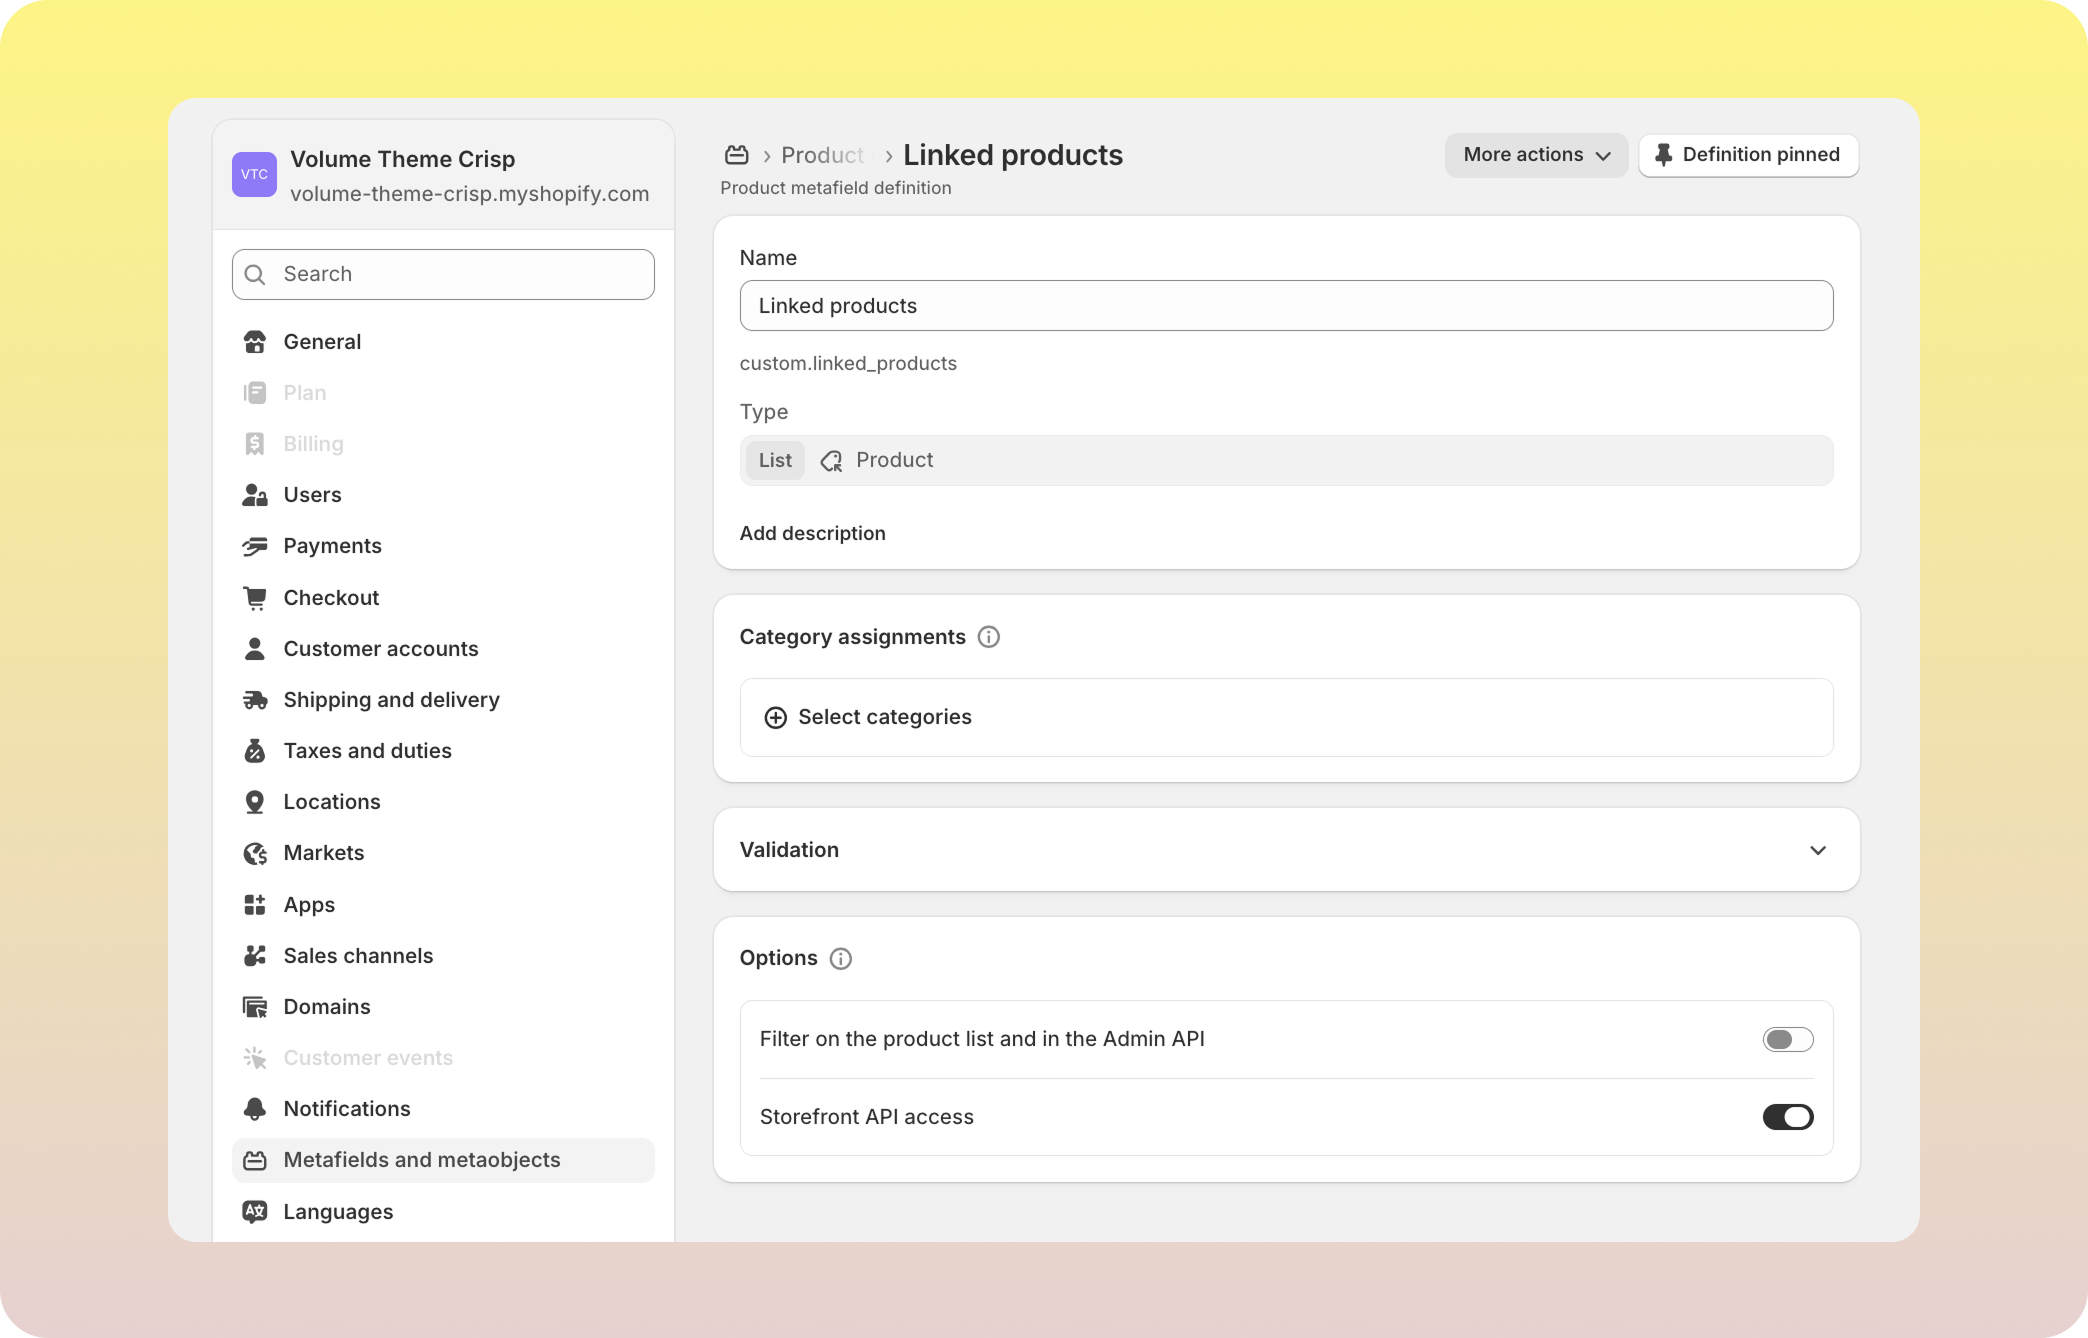
### Step 1 — Create the metafield
1. Go to **Shopify Admin → Settings → Metafields and metaobjects → Products**
2. Click **Add definition**
3. Fill in the fields:
* **Name:** `Linked products` (this is just a visible label — can be in any language)
* **Namespace and key:** `custom.linked_products`
* **Type:** Product — List of products
4. Save
{% hint style="warning" icon="triangle-exclamation" %}
**The Namespace and key field is what matters.** Make sure `custom.linked_products` goes into the **Namespace and key** field — not the Name field. The Name field is just a visible label and can be anything. If you type `custom.linked_products` into the Name field by mistake, Shopify will add its own `custom.` prefix on top, resulting in `custom.custom.linked_products` — and the theme won't recognize it.
{% endhint %}
{% endstep %}
{% step %}
### Step 2 — Link products together
1. Go to **Shopify Admin → Products → \[your product]**
2. Scroll down to **Product metafields**
3. Find **Linked products** and select all the products in the same color group
4. **Include the current product itself** — this makes it appear first and look selected when a customer views that product
5. Save
Each product in the group must have the metafield filled in — including the current product itself. If any product is missing it, its swatch won't appear on the other products' pages.
#### Swatch order
Order is set by drag-and-drop directly inside the metafield on the product page — not in the Variants section. The order must be set manually in each product of the group. If you skip this, swatches will appear in a different order on different product pages.
{% endstep %}
{% step %}
### Step 3 — Add the block in Theme Editor
1. Go to **Theme Editor → Products → Default product template**
2. Inside the **Product overview** section click **Add block → Linked products**
3. Save
{% endstep %}
{% step %}
### Step 4 — Adjust the design
1. In Theme Editor go to **Theme settings → Variant picker**
2. Scroll down to **Linked Products**
3. Adjust **Image ratio**, **Focal point**, **Corner radius** and **Shadow** to match your store design
{% endstep %}
{% endstepper %}
***
### Optional: Use color swatches instead of product images
By default, each swatch shows the first image of the linked product. You can replace it with a solid color or a custom image (useful for textures like wood grain, marble, etc.).
#### Option A — Solid color swatch
1. Go to **Shopify Admin → Settings → Metafields and metaobjects → Products**
2. Click **Add definition** and create a new metafield:
* **Name:** `Linked color`
* **Namespace and key:** `custom.linked_color`
* **Type:** Color
3. Save
4. Open each product, scroll to **Metafields**, and pick the color
The theme will automatically replace the product image with this color in the Linked Products block.
#### Option B — Custom image swatch
1. Create a metafield with these settings:
* **Name:** `Linked image`
* **Namespace and key:** `custom.linked_image`
* **Type:** File
2. Upload a small square image (PNG, \~100×100 px) for each product
{% hint style="success" icon="sparkles" %}
**Note:** If both `custom.linked_color` and `custom.linked_image` are filled in, the image takes priority.
{% endhint %}
***
### Troubleshooting
Swatches are not showing on the product page
Check that:
* The **Linked products** block is added inside the Product overview section in Theme Editor
* The metafield **Namespace and key** is exactly `custom.linked_products` — not `custom.custom.linked_products` or anything else. Go to **Settings → Metafields and metaobjects → Products**, click your definition, and verify the value under "Namespace and key"
* The metafield is filled in on the product you're viewing — including the product itself
* Every product in the group has the metafield filled in (not just one of them)
Swatches appear in the wrong order
The order follows the sequence of products in the metafield. Go to **Shopify Admin → Products → \[your product] → Metafields → Linked products** and drag the items into the desired order.
Remember to update the order on **every product in the group** — each product has its own independent list.
I see product photos instead of colors
Create the `custom.linked_color` metafield (see "Optional: Use color swatches instead of product images" above) and assign a color to each product. Without this metafield, the theme defaults to showing the first product image.
***
### Related
* [Size Guide](/docs/volume-themes/products/size-guide.md) — how to set up a size chart using metafields
* [Smart Category Menu](/docs/volume-themes/navigation/smart-category-menu.md) — another way to organize products on Collection pages
---
# Agent Instructions
This documentation is published with GitBook. GitBook is the documentation platform designed so that both humans and AI agents can read, navigate, and reason over technical content effectively. Learn more at gitbook.com.
## Querying This Documentation
If you need additional information that is not directly available in this page, you can query the documentation by asking a question.
Perform an HTTP GET request on the following URL with the `ask` and `goal` query parameters:
```
GET https://staylime.com/docs/volume-themes/products/linked-products.md?ask=&goal=
```
`ask` is the immediate question: it should be specific, self-contained, and written in natural language.
`goal` is what the user is ultimately trying to achieve, the reason they need the answer. Sharing it helps GitBook give you a better, more relevant answer. A goal is most helpful when it describes the outcome the user wants rather than restating the question. For example, with `ask=how do I create an API token`, a goal like `automate deployments from our CI pipeline` lets GitBook tailor the answer to that use case.
The response will contain a direct answer to the question and relevant excerpts and sources from the documentation.
Use this mechanism when the answer is not explicitly present in the current page, you need clarification or additional context, or you want to retrieve related documentation sections.
.png?alt=media&token=c19d6ff4-2d1d-4611-9123-51f953ccf906)
.png?alt=media&token=6156d3ba-0a1c-4af7-bd5a-3dc637b5e684)
.png?alt=media&token=f72ce63f-08c0-450a-b491-2c6c9e958a92)