
Event Management Documentation
Getting started
Installing & upgrading
Requirements & compatibility
The extension is built for and will only work in conjunction with Adobe Commerce and Magento 2. Specifically, the extension is compatible with the 2.4.x branch
The Class Manager extension is compatible with PHP 7.3 - 8.2, however, as of version 1.3.0, the iCal library (responsible for the "add to calendar" links) no longer works with PHP 7.3. If you need to use PHP 7.3, we recommend disabling Add to Calendar functionality.
Installing
Upon purchasing a license, the extension will be installed for free by one of our expert developers.
Upgrading
To upgrade the extension to the latest version, navigate to your Magento root directory and run the following commands:
php -d memory_limit=-1 composer.phar require staylime/classmanager
php bin/magento setup:upgrade
php bin/magento setup:di:compile
php bin/magento setup:static-content:deploy
php bin/magento cache:clean
Disabling
You can disable the extension using native Magento commands.
To disable the extension:
php -d memory_limit=-1 composer.phar require staylime/classmanager
php bin/magento setup:di:compile
Similarly, to re-enable it:
php bin/magento module:enable --clear-static-content Staylime_ClassManager
php bin/magento setup:di:compile
php bin/magento setup:static-content:deploy
php bin/magento cache:clean
If you have any modules that are dependent on the extension you will need to disable those either beforehand or at the same time.
Uninstalling
You can uninstall the extension using native Magento commands.
We recommend that this only be done by an experienced Magento 2 developer.
To uninstall the extension (and create backups in case anything goes wrong):
php bin/magento module:uninstall Staylime_ClassManager --backup-code --backup-media --backup-db
If you have any extensions that are dependent on the extension you will have to uninstall those at the same time.
Unit Tests
To ensure the stability and reliability of the extension, we have built unit tests for core functions. Running the unit tests after upgrading the extension (or Magento or any other extension) will verify the internal structure of the extension.
The extension unit tests do not support testing of Magento core functionality such as placing orders, nor do they test compatibility with other extensions or themes. These will all need to be tested manually.
To run the unit tests, navigate to your Magento root directory and run the following command:
php vendor/phpunit/phpunit/phpunit -c dev/tests/unit/phpunit.xml.dist
vendor/staylime/classmanager/Test/Unit/
Companion extensions
The following extensions can be used to enhance the extension’s functionality.
GraphQL
The extension can be made PWA-compatible with the addition of the GraphQL module. To install from packagist, run the following command:
composer require staylime/classmanager-graphql
In-store payment
If you will be having employees register customers for classes you may want to provide a special payment option for them to use when payment for the class will not take place on the website (for example on an in-store POS). The following module will allow them to checkout without providing payment details. (The Purchase Location report can help you track these transactions.)
- In-Store Payment To install, run the following CLI commands
composer config repositories.toddlininger/storepayment vcs [email protected]:toddliningerdesign/magento-store-payment.git
composer require toddlininger/storepayment
Payment method restrictions
If you will be offering your employees an in-store payment method (see above), you’ll need to restrict access to it so that regular customers are unable to use it. Both of these are good options:
Supply list downloads
These extensions allow you to attach files to products, which, in the context of the extension, is most commonly used to provide downloadable supply lists.
We have also created a free add-on module that works with version 1.8.0+ and the Mageworx extension that allows you to include product attachments in the extension emails!
To install the module, run the following CLI commands:
composer config repositories.toddlininger/classattachments vcs [email protected]:toddliningerdesign/magento-class-attachments.git
composer require toddlininger/classattachments
Templates for commonly used custom options
If you have one or more custom options that are used across all of your classes (like a comments field or class policy consent), you may want to consider installing an extension to help manage those. We recommend:
Licensing
License
Below is the full text of the Event Management license:
Software License Agreement (SLA) for the Event Management Extension for Magento 2
This Software License Agreement ("SLA") is a legal agreement between you and Staylime Inc. (“Vendor”). By installing and using the Event Management Extension for Magento 2 (“Software”), you are confirming your acceptance of the Software and agreeing to become bound by the terms of this SLA.

If you are entering into this SLA on behalf of a company or other legal entity, you represent that you have the authority to bind such entity and its affiliates to these terms and conditions. If you do not have such authority or if you do not agree with the terms and conditions of this SLA, do not install or use the Software, and you must not accept this SLA.

This SLA shall apply only to the Software supplied by Staylime Inc. herewith regardless of whether other software is referred to or described herein. The terms also apply to any Vendor updates, supplements, Internet-based services, and support services for the Software, unless other terms accompany those items on delivery. If so, those terms apply.

LICENSE GRANT

Staylime Inc. hereby grants you a personal, non-transferable, non-exclusive license to use the Software on your devices in accordance with the terms of this SLA.

You are permitted to install and run the Software on one or more computer servers, hosting a single website domain. While use is only granted for a single production domain, additional domains can be used solely for testing and staging purposes. You are responsible for ensuring your devices meet the minimum requirements of the Software.

The license for this Software is not perpetual; it is granted only for the time period (the “Subscription Term”) for which you have paid. If you cancel or fail to pay for your Subscription Term, your Subscription Term will be considered “expired,” the license will be immediately suspended and you will be required to uninstall the Software from all devices within 15 days of license suspension, unless other terms are agreed upon. If so, those terms apply.

In order for the Software to be functional you may be required to install a License Key (“Key”) in order to validate the Subscription Term. The Key can be deactivated by the Vendor to remotely disable the Software on your computer in the event that you have not paid for your Subscription Term.

You are not permitted to:

- Edit, alter, modify, adapt, translate or otherwise change the whole or any part of the Software nor permit the whole or any part of the Software to be combined with or become incorporated in any other software, nor decompile, disassemble or reverse engineer the Software or attempt to do any such things

- Reproduce, copy, distribute, resell or otherwise use the Software for any commercial purpose

- Allow any third party to use the Software on behalf of or for the benefit of any third party

- Use the Software in any way which breaches any applicable local, national or international law

- Use the Software for any purpose that Staylime Inc. considers is a breach of this SLA

INTELLECTUAL PROPERTY AND OWNERSHIP

Todd Lininger Design, LLC shall at all times retain ownership of the Software as originally downloaded by you and all subsequent downloads of the Software by you. The Software (and the copyright, and other intellectual property rights of whatever nature in the Software, including any modifications made thereto) are and shall remain the property of Todd Lininger Design, LLC.

Staylime Inc. reserves the right to grant licenses to use the Software to third parties.

SOFTWARE REQUIREMENTS

This Software is an extension built for Magento Open Source and therefore requires Magento Open Source (version 2.3.0 or higher) to function. The Software will not function and is not supported without Magento. While it may also run on other versions of Magento (e.g. Magento Commerce), functionality and use on other versions is not guaranteed and not supported. The Magento Open Source software can be obtained from https://magento.com/tech-resources/download.

CUSTOMIZATION

Due to the modular and hierarchical nature of Magento, it is possible for the Software to be customized and extended without modifying the Software directly. This type of external customization and extension is permitted so long as no modifications are made to the Software. All other customizations and modifications can and will only be performed by Staylime Inc. and/or developers contracted by Staylime Inc.

TERMINATION

This SLA is effective from the date you first use the Software and shall continue until terminated. You may terminate it at any time upon written notice to Staylime Inc.

It will also terminate immediately if you fail to comply with any term of this SLA. Upon such termination, the licenses granted by this SLA will immediately terminate and you agree to stop all access and use of the Software. The provisions that by their nature continue and survive will survive any termination of this SLA.

GOVERNING LAW

This SLA, and any dispute arising out of or in connection with this SLA, shall be governed by and construed in accordance with the laws of Washington state and the United States of America.

Modified Wednesday, June 23, 2021, 12:00 PM PDT
Purchasing the license
The extension’s license may be purchased by getting in touch with us using the contact form below. Upon purchasing the license a unique key will be provided to you. Your license key is valid for the period of time for which you’ve paid. When that time has expired you will be required to renew your license in order to continue using the extension.
License Key
Once received, your license key must be installed in the extension’s config settings. After installation of a valid key you will see the status of the license:

The license key is configured for one production domain and up to two additional development or staging domains, as needed. To add or change production, development or staging domains on your license, contact us.
Common Questions
-
Is any session or roster data deleted?
No, your session and roster data is safe and will reappear be there once you’ve renewed your license.
-
Will customers still be able to register for classes if my license is expired?
Your customers will still be able to register for classes. There will be no visible difference on the front end.
-
Will class and event related emails still be sent out?
Your customers will still receive all enabled class and event related emails.
Configuration
General
Version
Type: informational onlyShows the currently installed version of the Event Management for Magento 2 extension.
License Key
Type: text boxEnter your license key here and press the "Save Config" button to validate your license.
Default: empty
License Key Status
Type: informational onlyShows the current status of your Event Management for Magento 2 license.
System
Email Sender Name
Type: text boxOptionally specify a unique "from" name to use for all class and event related emails. If none is specified, Magento's General Contact Sender Name will be used.
Default: Use system value
Email Sender Address
Type: text boxOptionally specify a unique "from" address (like [email protected] or [email protected]) to use for class and event related emails. If none is specified, Magento's General Contact Sender Email will be used.
Default: Use system value
Send Email Copies To
Type: text boxOptionally specify a comma-separated list of email addresses to BCC on all Event Management for Magento 2 emails. (Depends on host; some hosts disable BCC for security reasons.)
Default: empty
Class Product
Default Tax Class
Type: dropdown menuIf classes and events are taxed differently from the rest of your products, you can optionally set a default tax class for your class products. This will override Magento's own default tax class when creating new class products. A different tax class can still be chosen on a product level. This is only a default.
Default: Use system value
Stock Status for Classes with No Active Sessions
Type: dropdown menuIf set to Out of Stock, classes and events with no active sessions will be displayed as "out of stock" on the front end. Visibility of "out of stock" sessions can then be controlled by Magento's native Display Out of Stock Products setting under Catalog > Inventory > Stock Options.
This setting only applies to category and search pages; product pages remain unchanged and will still show the message "Registration for this class is no longer available" when there are no active sessions.
Options:
Out of StockIn Stock
Default: Out of Stock
Show Instructors Tab
Type: enable/disableEnable or disable the "Instructors" tab on class product pages on the front end.
Default: Enable
Class Policy for Emails
Type: text area with WYSIWYG editorIf provided, the entered text/HTML will be embedded in select Event Management emails (registration confirmation, waitlist confirmation, reminders, changes, and cancelations) where the {{var policy_text |raw}} variable is inserted.
Default: blank
Class Policy for Product Page Tab
Type: text area with WYSIWYG editorIf provided, the entered text/HTML will be displayed under a "Class Policy" tab on all class and event product pages. If empty, the tab will not appear.
Default: blank
Special Notice
Type: text area with WYSIWYG editorIf provided, the entered text/HTML will be displayed at the top of all class and event product pages, above the product name. If empty, the notice will not appear.
Default: blank
Class Registrations and Wait Lists
Customer Groups Enabled for In-Store Registration
Type: multi-selectThe customers who are part of the customer group(s) selected here will be able considered employees and will be able to register customers on the their behalf. See Employee Registrations for more details.
Default: none selected
Send Registration Details to Registrant
Type: enable/disableIf enabled, an email will be sent to customers when they register for a session. The email will only be sent once their registration reaches Active status (payment has been received). See Emails for details.
Default: Enable
Email Template for Registration Details
Type: dropdown menuChoose the email template to use for sending registration details to the customer.
Default: default extension template
Notify Registrant about Canceled Session
Type: enable/disableIf enabled, an email will be sent to registrants of a session when its status changes to canceled. See Emails for details.
Default: Enable
Email Template for Canceled Session
Type: dropdown menuChoose the email template to use for notifying registrants that a session has been canceled.
Default: default extension template
Notify Registrant about Changed Session
Type: enable/disableIf enabled, an email will be sent to registrants of a session when a change is made to the location or date/time. See Emails for details.
Default: Enable
Email Template for Changed Session
Type: dropdown menuChoose the email template to use for notifying registrants of changes to session location or date/time.
Default: default extension template
Change History Storage Time
Type: text boxLength of time (in days) to save the details of session changes. Entering 0 disables change tracking. When disabled, the details of session changes will not be included in the session change emails. The email (if enabled) will still be sent, but only the updated details will be shown without the context of the previous details.
Default: 7
Wait Lists
Type: enable/disableEnable this option if you want to allow customers to be added to a wait list after a session has reached its full capacity.
Default: Enable
Send Wait List Confirmation
Type: enable/disableIf enabled, an email will be sent to a customer when they join the wait list for a session. See Emails for details.
Default: Disable
Email Template for Wait List Confirmation
Type: dropdown menuChoose the email template to use for confirming a customer's addition to the wait list for a session.
Default: default extension template
Include Product Options in Wait List Form
Type: enable/disableIn enabled, any extra product options that are normally shown with the registration form will also be included on the wait list form. This way, information normally not gathered until the time of registration can be available along with the customer's wait list entry.
Default: Disable
Class Reminders
Type: enable/disableIf enabled, an email will be sent to registrants of a session at the specified intervals reminding them of their upcoming session. See Emails for details.
Default: Enable
Class Reminder Template
Type: dropdown menuChoose the email template to use for sending reminder emails to current registrants.
Default: default extension template
Days Before Session to Send Reminder
Type: text boxA number (or series of comma separated numbers) indicating how many days ahead of the beginning of a session that reminder emails should be sent. The default of 1,7 means one will be sent 7 days ahead of the start of the session and another will be sent one day ahead of the start of the session.
Default: 1,7
Limit Reservation Time While Payment Is Pending
Type: text boxWhen an order is placed, a customer registration has a status of Reserved until payment is received. If payment has not been received within this many hours of order placement, the registration status will be changed to Canceled and the reserved spot will be released. Enter 0 to disable auto-cancel and keep the spot reserved indefinitely.
Default: 0
Auto Open Registration Form
Type: enable/disableWhen enabled, the registration form popup will automatically open on the product page when a session ID is provided in the URL. (Links from the calendar function this way.) When disabled, the session will still be preselected, but the customer will need to press the Register button for the registration form to be shown.
Default: Disable
Text for Supply List Items (Related Products)
Type: text boxEnter the text to be shown above the related products block on the session registration form. See Related Products for details.
Default: Add these products to your cart to make sure you have everything you need!
Confirm Email
Type: enable/disableWhen enabled, a required "Confirm email" field will be added to the registration form. The value in that field must match the value in the "Email" field in order for registration to proceed. Note: when a customer is logged in and their email address has been pre-filled into the form, the confirm email field will not be included.
Default: Disable
Sessions
Quantity at Which to Show Number of Seats Available
Type: text boxSets the quantity below which the number of available spots will be shown next to session listing on the front end. Entering 0 will disable this feature.
Default: 5
Hours Before or After Session to Expire Registration
Type: text boxA positive or negative number indicating how many hours before (negative) or after (positive) a session starts or ends to expire registration. After this time, customers will no longer be able to register for an expired session and it will show as expired on the calendar. Decimals are also allowed. For example, you could enter -0.5 for a half hour before the expiration anchor.
Default: 0
Anchor Expiration Time to Beginning or End of Session
Type: dropdown menuChoose whether the expiration time for sessions will be anchored to beginning of the first session or the end of the last session.
Options:
Beginning of SessionEnd of Session
Default: Beginning of Session
Number of Sessions to Highlight on Product Page
Type: text boxIf the number of sessions for a class or event exceeds this value, the number of sessions displayed by default will be limited to this number and a "Show all sessions" link will expand the rest of the list. If set to 0, all active and canceled sessions will be readily visible no matter the quantity.
Default: 12
Disallow Session Quantity Adjustments in Cart
Type: enable/disableSince registration details (name, email, phone, etc.) do not change when quantity is changed, it is recommended to disallow quantity editing for class products. If disabled, quantity will be adjustable in the cart for individual registrations.
Default: Enable
Default text for no sessions
Type: text boxText entered here will be shown on class/event product pages when there are no sessions available. (Can be overwritten on the product level.)
Default: Registration for this class is no longer available
Notify Instructors About Changed and Canceled Sessions
Type: enable/disableIf enabled, an email will be sent to the instructor of a session when there is a change or cancelations to one of their sessions. See Emails for details.
Default: Disable
Instructor Email Template for Changed Session
Type: dropdown menuChoose the email template to use for notifying instructors of changes to their sessions.
Default: default extension template
Instructor Email Template for Canceled Session
Type: dropdown menuChoose the email template to use for notifying instructors that one of their sessions has been canceled.
Default: default extension template
Import Sessions
Default Status
Type: dropdown menuSet the default session status to be used if a row in the supplied CSV is missing one.
Default: Active
Default Location
Type: dropdown menuSet the default location to be used if a row in the supplied CSV is missing one. If set, this will also be used to auto-select a default when manually creating new sessions.
Default: No location selected
Default Instructor
Type: dropdown menuSet the default instructor to be used if a row in the supplied CSV is missing one. If set, this will also be used to auto-select a default when manually creating new sessions.
Default: No instructor selected
Default Qty
Type: text boxSet a default session quantity to be used if a row in the supplied CSV is missing a Qty value.
Default: empty
Class Threshold
Minimum Enrollment Threshold
Type: text boxAny positive integer will enable an enrollment threshold for your classes and events. Once enrollment reaches the minimum threshold, an email can be sent to the instructor and anyone listed in the CC Threshold Emails To field. If enrollment subsequently falls below the threshold, an email can be sent to the same recipients alerting them of the decrease.
Default: 0 (disabled)
Statuses to Count Toward Threshold
Type: multi-selectSelect which session statuses you want to count toward the minimum threshold.
Options:
ActiveCanceledReservedWait List
Default: Active
Notify Instructor When Threshold Is Reached
Type: enable/disableIf enabled, an email will be sent to the session instructor (and those listed in CC Threshold Emails To) when the threshold has been met. See Emails for details.
Default: Disable
Email Template for Threshold Reached
Type: dropdown menuChoose the email template to use for notifying instructors that the threshold has been reached.
Default: default extension template
Notify Instructor If Registration Drops Below Threshold
Type: enable/disableIf enabled, an email will be sent to the session instructor (and those listed in CC Threshold Emails To) when the threshold has been met. See Emails for details.
Default: Disable
Email Template for Registration Drop
Type: dropdown menuChoose the email template to use for notifying instructors that enrollment has fallen back below the threshold.
Default: default extension template
CC Threshold Emails To
Type: text boxA comma-separated list of email addresses may be entered here in order to copy administrators or managers on all threshold related emails.
Default: empty
Surveys
Enabled
Type: enable/disableThis setting enables or disables class and event surveys. You will not be able to enable surveys until at least one survey form has been created.
Default: Disable
Default Survey
Type: dropdown menuSelect a default survey form to be used for all sessions. Alternate surveys can be selected on a session-by-session basis.
Default: none selected
Class Survey Email Template
Type: dropdown menuChoose the email template to use for requesting feedback from class and event participants. Surveys are sent to all those whose registration had an Active status when the session ended. See Emails for details.
Default: default extension template
Delay to Send Survey After Completed Session
Type: text boxYou can set a delay (in hours) between when the session is complete and when the survey email is sent. Enter 0 to send the email the moment the session ends.
Default: 0
Send Surveys to Registrants with Status
Type: dropdown menuProvides the option to only send surveys to registrants who have an Attended registration status. By default surveys will be sent to registrants with either an Active or Attended status.
Warning: if set to Only send to 'Attended', be sure to leave yourself enough time to update attendee registration status before survey emails are scheduled to be sent in Delay to Send Survey After Completed Session.
Default: Send to 'Active' and 'Attended'
Default Rating Option Label
Type: text boxIf no rating option label is specified on a survey level, then this default will be used.
Default: On a scale of 1 to 5 (with 5 being "absolutely wonderful") how would you rate this class?
Capacity
Session Capacity Warning Threshold
Type: text boxThe percentage at which the "capacity" bar on the Sessions and Rosters grids will turn yellow.
Default: 75%
Zoom Sessions
Enabled
Type: enable/disableThis setting enables or disables the Zoom integration.
Default: Disable
Zoom Token
Type: text boxEnter your Zoom API token in this field. Instructions on obtaining your token can be found here.
Default: empty
Zoom Users Department
Type: text boxSpecify the name of the department you've assigned to the hosts you want to use in the integration. See Select a department for details.
Default: Online Events
Zoom Status
Type: informational onlyShows whether your Zoom account has been properly connected and how many host licenses are available in your account.
Send Customer Join Link
Type: enable/disableIf enabled, an email will be sent to customers containing the link required to join the Zoom meeting. See Joining Zoom Sessions for details.
Default: Enable
Customer Email Template
Type: dropdown menuChoose the email template to use for sending the Zoom join link to the customer. See Emails for details.
Default: default extension template
How many minutes in advance of session should access details be given to customer?
Type: text boxThe number of minutes before the session starts to make the join link available to the customer on their My Classes page as well as in an email (if enabled).
Default: 120 (2 hours)
Send Instructor Start Link
Type: enable/disableIf enabled, an email will be sent to the session instructor containing the link required to start the Zoom meeting. See Joining Zoom Sessions for details.
Default: Enable
Instructor Email Template
Type: dropdown menuChoose the email template to use for sending the Zoom start link to the instructor of the session. See Emails for details.
Default: default extension template
How many minutes in advance of session should access details be given to instructor?
Type: text boxThe number of minutes before the session starts to send the start link email to the instructor.
Default: 1440 (24 hours)
Require participants to have a Zoom account to attend
Type: enable/disableEnabling this option increases the security of your meetings by limiting attendance according to your registrants' email addresses, but it places more burden on your attendees by requiring them to have a Zoom account that matches their registration email and be logged in to join.
Default: Disable
Other
Include Instructors with No Sessions Available on Instructors Page
Type: enable/disableIf enabled, the names of all instructors will be listed on the Instructors page, regardless of whether they currently have any sessions available. If disabled, only instructors with available sessions will be listed.
Default: Enable
Add to Calendar Links
Type: enable/disableEnables links to iCal (.ics) files for sessions so that customers can add classes and events they've registered for to the calendar app of their choice. Links are placed in emails as well as on the My Classes page.
Default: Enable
Add Events Calendar to Top Menu
Type: enable/disableIf enabled, a link to the main (unfiltered) event calendar page will be added to Magento's top menu. (May not be compatible with some themes and third-party extensions.)
Default: Disable
Include links to product downloads in emails
Type: enable/disableIf enabled, links to file downloads associated with the class product will be included in relevant emails (registration confirmation, reminders, changes, Zoom join links).
Requires installation of a free add-on module and the Mageworx Product Attachments and File Downloads extension.
Default: Disable
Danger Zone
Flush Email Queue
Type: buttonClicking this button (and clicking OK to the subsequent warning message) will delete all currently scheduled Event Management“ emails including Zoom links, reminders, and surveys.
This can also be achieved by running the CLI command:: bin/magento classmanager:flushemailqueue
WARNING: we do not recommend flushing the email queue on a production website. This functionality is meant to prevent emails queued in your production environment from being sent out when you've cloned your production website to a staging or development environment.
Permissions (User Roles)
Class Manager provides flexibility when it comes to user role permissions. Here are some example use cases:
- Instructors: you can allow your instructors to view (and optionally export) rosters (though unfortunately there's no way to restrict rosters by instructor). You can choose whether they have the additional capability of modifying and/or deleting individual registrations.
- Marketing Manager: you can allow your marketing manager to view and export Survey Responses and the Customer Classes report.
- Accountant: you can allow your accountant access to the Purchase Location report so they can view whether purchases were made by an employee or by the customer themselves.
- Restricting Roster Changes: leaving TL Class Manager > Main Group > Rosters > Edit Registrations > Full Edit unchecked will restrict roster editing to the Quantity and Notes fields. If checked, users will have full editing capabilities.
You can set user role resources by going to System > Permissions > User Roles in Magento.
Translating Event Management
Overview
As of version 1.4.0), almost all frontend and email text (as well as some backend text) can be translated or customized using standard Magento i18n translation files.
The one area that cannot be translated is the frontend calendar's UI, as seen in this image:

The language files are structured in typical CSV format with the default text on the left side of a comma, and your translated on the right. If there is a space in the phrase, the phrase needs to be surrounded by double quotation marks. To change a phrase, edit the text on the right side of the comma and leave the text on the left side exactly how it is.
When you see a word preceeded by %, that is a placeholder for a variable that will be inserted. Do not change the name of these variables.
Here is an example of the file structure, using a few lines from the default language file:
Class,Class
“Registrant Name”,“Registrant Name”
“Registrant Email”,“Registrant Email”
“%fieldName is a required field.”,“%fieldName is a required field.”
“You have no upcoming classes.”,“You have no upcoming classes.”
The full list of translatable phrases can be found in staylime/classmanager/i18n/en_US.csv.
Other Languages
To translate all Event Management phrases to another language, place your language's translation file (e.g. nl_NL.csv for Dutch), in app/design/[AREA]/[THEME_VENDOR]/[THEME_NAME]/i18n/ and re-deploy static content using the command php bin/magento setup:static-content:deploy -f nl_NL.
Note that if you are using Magento's native Blank theme — or a theme that inherits from Blank — you will need to place your translation files in app/i18n/[THEME_NAME]/[lang_lang]/[lan_LOC.csv] instead.
Refer to Magento's documentation to learn more about translating extension text into other languages.
Customizing Text
Even if you're not translating all Event Management phrases into another language, it is also possible to customize the phrases used throughout the extension. For example, you might want to change the word Class to Workshop or Webinar.
You can achieve this by copying the staylime/classmanager/i18n/en_US.csv file to your theme folder (app/design/frontend/[THEME_VENDOR]/[THEME_NAME]/i18n/) and customizing it there. Do not make changes directly to staylime/classmanager/i18n/en_US.csv as they will be overwritten when the extension is upgraded.
Refer to Magento's documentation to learn more about overriding default strings.
Emails Event Management
Event Management for Magento 2 could arguably be considered a CRM (Customer Relationship Manager) because of all of the communication that it handles. Below is an overview of all Event Management emails. Every email can be enabled/disabled via the extension's configuration settings.
Note: no emails are sent to customers whose registration status isReservedorCanceledat the time the email is triggered. The only email a customer whose registration status isWait Listwill receive is the Wait List Confirmation email.
You can monitor all Event Management emails by setting a BCC address in the configuration settings.
Registration Confirmation
When a customer registers for a session (or an employee registers a customer on their behalf) an email will be sent to the email address given in the registration confirming that they have been registered.
The Registration Confirmation email will only be sent once a customer's registration status reaches the Active state. If the registration remains in Reserved status (i.e. unpaid) then the email will not be sent.
An order comment is added when this email has been sent.
The default Registration Confirmation email includes the following information:
- Event Details:
- Event title (with link to webpage)
- Session date and time
- Instructor's name
- Location name
- Location address
- Location phone number
- Registration Details:
- Registrant name
- Registrant email
- Registrant phone
- Product attachments/downloads (more info)
- Class Policy (if not blank)
The email also includes an Add to Calendar link so that customers can add the session to their favorite calendar app.
| Recipient | Trigger | Default Template | Available Variables |
|---|---|---|---|
Session attendees with Active registration status |
Registration status reaches Active state |
TL Class Registration Details |
product_name
product_url_tl
ical_link
session.date_time
session.instructor
session.location
session.address
session.phone
registrant.name
registrant.email
registrant.phone
attachments
policy_text
|
Wait List Confirmation
When a customer joins the waitlist for a session that is full an email will be sent to the provided email address confirming that they have been added to the wait list.
The default Wait List Confirmation email includes the following information:
- Event Details:
- Event title (with link to webpage)
- Session date and time
- Instructor's name
- Location name
- Location address
- Location phone number
- Class Policy (if not blank)
The email also includes an Add to Calendar link so that customers can add the session to their favorite calendar app.
| Recipient | Trigger | Default Template | Available Variables |
|---|---|---|---|
Session attendees with Wait List registration status |
Registration status reaches Wait List state |
TL Class Wait List Notification |
product_name
product_url_tl
session.date_time
session.instructor
session.location
session.address
session.phone
policy_text
|
Reminders
Reminder emails are sent to session registrants who have an active registration status to remind them of their upcoming event. Multiple reminders can be sent according to a configurable schedule.
An order comment is added when this email has been sent.
The default Reminder email includes the following information:
- Event Details:
- Event title (with link to webpage)
- Session date and time
- Instructor's name
- Location name
- Location address
- Location phone number
- Registration Details:
- Registrant name
- Registrant email
- Registrant phone
- Product attachments/downloads (more info)
- Class Policy (if not blank)
The email also includes an Add to Calendar link so that customers can add the session to their favorite calendar app.
| Recipient | Trigger | Default Template | Available Variables |
|---|---|---|---|
Session attendees with Active registration status |
Sent at intervals specified in configuration | TL Class Reminder |
product_name
product_url_tl
ical_link
session.date_time
session.instructor
session.location
session.address
session.phone
registrant.name
registrant.email
registrant.phone
attachments
policy_text
|
Changes
If any change is made to the location or date and time of a session, an email will be sent to registrants of that session who have an active registration status to notify them of the change(s).
An order comment is added when this email has been sent.
You can also elect to send this to the instructor of the session as well.
The default Change email includes the following information:
- Event Details:
- Event title (with link to webpage)
- Previous session date and time (1.2.8, only available if change history storage is enabled)
- New session date and time
- Instructor's name
- Previous location name (1.2.8, only available if change history storage is enabled)
- New location name
- Previous location address (1.2.8, only available if change history storage is enabled)
- New location address
- Previous phone number (1.2.8, only available if change history storage is enabled)
- New phone number
- Registration Details:
- Registrant name
- Registrant email
- Registrant phone
- Product attachments/downloads (more info)
- Class Policy (if not blank)
The email also includes an Add to Calendar link so that customers can add the session to their favorite calendar app.
| Recipient | Trigger | Default Template | Available Variables |
|---|---|---|---|
Session attendees with Active registration status |
A change is made to the session date, time or location | TL Class Changed Session |
product_name
product_url_tl
ical_link
previous_dates(1.2.8)
previous_loc_name(1.2.8)
previous_loc_address(1.2.8)
previous_loc_phone(1.2.8)
session.date_time
session.instructor
session.location
session.address
session.phone
registrant.name
registrant.email
registrant.phone
attachments
policy_text
|
| Session instructor | A change is made to the session date, time or location | TL Class Instructor Changed Session |
product_name
product_url_tl
ical_link
previous_dates(1.2.8)
previous_loc_name(1.2.8)
previous_loc_address(1.2.8)
previous_loc_phone(1.2.8)
session.date_time
session.instructor
session.location
session.address
session.phone
|
Cancelations
If a session is canceled, an email will be sent to registrants of that session who have an active registration status to notify them of the cancelation.
An order comment is added when this email has been sent.
You can also elect to send this to the instructor of the session as well.
The default Cancelation email includes the following information:
- Event Details:
- Event title (with link to webpage)
- Session date and time
- Instructor's name
- Location name
| Recipient | Trigger | Default Template | Available Variables |
|---|---|---|---|
Session attendees with Active registration status |
Session status is changed to Canceled |
TL Class Canceled Session |
product_name
product_url_tl
session.date_time
session.instructor
session.location
registrant.name
policy_text
|
| Session instructor | Session status is changed to Canceled |
TL Class Instructor Canceled Session |
product_name
product_url_tl
session.date_time
session.instructor
session.location
|
Zoom Links
Zoom Link emails are sent to registrants with an active registration status and instructors of online Zoom sessions so that they have the information they need to join the scheduled Zoom call.
The default Zoom Link email includes the following information:
- Event Details:
- Event title (with link to webpage)
- Session date and time
- Joining Info:
- Join Meeting link (sent to customers only)
- Start Meeting link (sent to instructors only)
- Meeting ID
- Meeting password
- Product attachments/downloads (more info)
The default Zoom Link email templates also contain brief tips and links to helpful articles in case the customer has trouble joining the session.
| Recipient | Trigger | Default Template | Available Variables |
|---|---|---|---|
Session attendees with Active registration status for Zoom session |
Sent at interval specified in configuration | TL Class Zoom Customer Join |
product_name
product_url_tl
session.date_time
zoom.registrant_link
zoom.registrant_pass
join_info
registrant.name
attachments
policy_text
|
| Session instructor for Zoom session | Sent at interval specified in configuration | TL Class Zoom Instructor Start |
product_name
product_url_tl
session.date_time
session.instructor
zoom.instructor_host
zoom.instructor_link
zoom.instructor_pass
join_info
|
Surveys
After a session has completed, a survey email can be sent out at a configurable time to gather feedback from the attendees and use it to improve future offerings.
Only customers whose registration status is Active at the time the email is sent will receive the survey email.
The default Survey email includes the following information:
- Event Details:
- Event title (with link to webpage)
- Session date and time
- Instructor's name
- Location name
- Link to fill out the survey
| Recipient | Trigger | Default Template | Available Variables |
|---|---|---|---|
Session attendees with Active registration status |
At interval specified in configuration once session status reaches Complete |
TL Class Survey |
product_name
product_url_tl
session.date_time
session.instructor
session.location
registrant.name
survey_email_text
url
|
Minimum Threshold
Instructors can be notified when the minimum threshold for a session has been reached and if it subsequently drops back below that threshold.
The default Threshold email includes the following information:
- Event Details:
- Event title (with link to webpage)
- Session date and time
- Location name
- Threshold Details:
- What the threshold for minimum enrollment is
- The number of customers currently enrolled
| Recipient | Trigger | Default Template | Available Variables |
|---|---|---|---|
| Session instructor | Session enrollment reaches specified threshold | TL Class Instructor Threshold Reached |
product_name
product_url_tl
session.date_time
session.instructor
session.location
session.threshold
session.qty
|
| Session instructor | Session enrollment drops below specified threshold | TL Class Instructor Threshold Drop |
product_name
product_url_tl
session.date_time
session.instructor
session.location
session.threshold
session.qty
|
Customer Opt-Out
As of version 1.6.0, customers have the ability to opt out of specific Event Management emails. Customers are opted into all of them by default, but if they'd like to opt out, they can go to the new Contact Preferences tab in their account. To minimize accidental opt outs, there is no unsubscribe link in the emails themselves; the only way to opt out is to visit the Contact Preferences page.
Customers have the option to individually opt out of (or opt back into) the following emails:
- Registration Confirmation
- Waitlist Confirmation
- Reminders
- Changes
- Cancelations
- Zoom Join Links
- Surveys
Each email listed has a brief description of its purpose, and at the top of the page there is also the following message encouraging them to remain subscribed:
THESE ARE NOT MARKETING MESSAGES; the purpose of them is to convey information about specific classes and events that you have either registered for or otherwise expressed interest in, so we highly recommend receiving all of them.
In addition, when they click the Update Preferences button, they will be presented with a confirmation dialog again urging them to remain subscribed:

The confirmation dialog will only be shown if they are opting out of one or more emails. If the customer is opting in to all emails, the preferences will be saved without showing the confirmation dialog.
Once the contact preferences have been saved, the customer will see a message confirming that a change was made.
Contact preferences for employee accounts are disabled, so emails for classes and events registered through employee accounts will always be sent.
Viewing and Managing Customer Preferences
As of version 2.2.0, admins have the ability to view and manage customer contact preferences in the backend. To do so, open a customer's account record in Magento (Customers > All Customers) and click on the Event Management Contact Preferences tab.
As mentioned above, emails for classes and events registered through employee accounts will always be sent, so any changes to contact preferences for employee accounts will be ignored.
Attaching Downloads
Oftentimes you may want to provide supply lists, printable templates or other files for your customers to download for your event. Event Management doesn't support this inherently, so we recommend the Mageworx Product Attachments and File Downloads extension for this.
Now, as of version 1.8.0, links to these files can be included in Event Management emails! In order to include them in your emails, please refer to the following requirements.
Requirements
- The Mageworx Product Attachments and File Downloads extension must be purchased and installed.
- The free add-on module must be installed.
- The Include links to product downloads in emails option must be enabled in the Event Management configuration.
- The Add files in 'New Order' emails option for the MageWorx extension must be enabled either globally or for the file(s) you want to attach.
- If using custom email templates, make sure the necessary code block (below) is present.
Code for Email Template
Note that the downloads block title and CSS can be adjusted as needed in your custom email template.
{{if attachments}}
<table class="full-width" style="margin-top: 10px;">
    <tr>
        <td>
            <div class="tl_attach_wrap" style="border: 2px solid #ecde11; border-radius:6px; padding:0 1em;">
                <h3>{{trans 'Downloads'}}</h3>
                <div>{{var attachments ⎪raw}}</div>
            </div>
        </td>
    </tr>
</table>
{{/if}}
Here's what the block looks like with the default formatting:

Support
What’s included
- Compatibility with Magento core code and Luma theme
- Limited compatibility fixes for third-party extensions and themes
- Fixes for any functionality issues and bugs
- Answering any questions or concerns relating to the extension
- Full documentation and tutorial videos
What’s not included
- Module customizations or custom feature development
- Extensive compatibility fixes for third-party extensions and themes
- Data recovery due to accidental changes or deletion
- Support and development not directly related to the CM extension
These services can be provided at an additional cost.
Classes & sessions
Class products
Creating a new class
The extension adds a new product type to Magento called "Class Reservation". You can create a new class product by either pressing the arrow next to the Add Product button on the Products grid and selecting "Class Reservation", or by pressing "Add New Class" at the top of the Sessions grid.
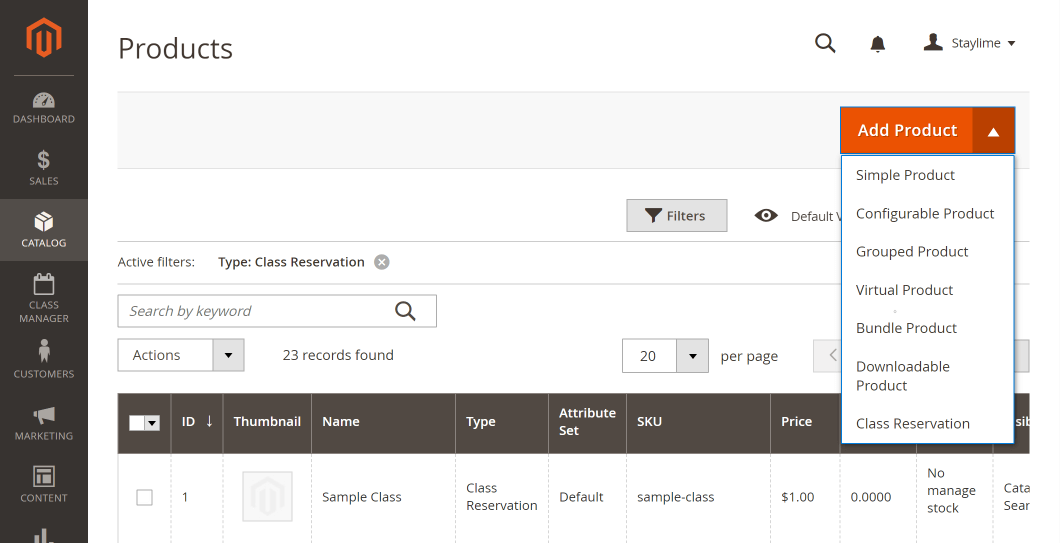
Supply all of the usual required product details such as title, SKU, price, visibility, categories, images, descriptions, etc.
Tip: if you want to link to the list of available sessions from anywhere else on the page, you can use the #product-reservation-form anchor (as of 1.5.0).
Class sessions tab
The Class Sessions tab is where you’ll create and manage all of your sessions for a class. See Class sessions for more details.

Class details tab
The Class Details tab is used for product-specific settings and contains only two options:
- This is a Special Event
Yes|NoSet this option to "Yes" to mark this class as a special event. This allows for filtering and highlights these events in certain areas of the website. - Text for No Sessions
(text field)This field can be used to change the default text that’s shown when no sessions are available. The default isRegistration for this class is no longer available, (however the default can be changed as well in CM settings). - Zoom Meeting Description
(text field)This description is only shown when you view your meeting within your Zoom account and if Zoom sends users emails about the meetings. If you've disabled the native Zoom emails then it won't do much, but it's there if you need it.
Customizable options
You can add custom options to class registrations under the Customizable Options tab. Whatever options you enter here will show on the registration form. Some common options include:
- Checkbox indicating agreement to terms
- Text field indicating make and model of your equipment (sewing machine, camera, etc.)
- Text field for other comments or requests (seating preferences, accommodation requests, etc.)
- Drop-down selection of meal preferences
- Checkbox indicating the supply list was downloaded
Supply list downloads
Prerequisites
File Attachments and Product Downloads extension must be installed.
Using the File Attachments and Product Downloads extension you can assign files, such as PDF supply lists, to the product. The download links will show up in a tab on the product page and can also be attached to order emails. They are not included in the extension’s emails yet, but we have plans to add that.
Deleting a Class
You can delete class products in the same way that you would delete any product, but keep in mind the following:
- When you delete a class, all sessions and rosters associated with it will also be deleted. If necessary, be sure to save copies of rosters (either exported to CSV or printed) before deleting.
- Be careful that you aren't deleting classes that have active sessions — especially those that span multiple weeks or months.
Category Widgets
There are two widgets that can be added to the top of product category pages. To add these widgets, browse to the category to which you want to add them in the backend, expand the Class Manager tab, and toggle Show Info Block to Yes.
Here are examples of the widgets in the default Luma theme:
Links to class calendars
This displays links to all filtered class calendar views as well as an "All Locations" calendar view (not category specific).

List of upcoming classes and events
This lists the next few upcoming classes and events (not category specific).

Product grid filters
The extension adds two new columns to the Magento Products grid:
Instructors
You can filter class products by instructor by entering an instructor’s name (or part of it) into the "Instructors" filter field. You can also sort by instructor. This can help you find certain classes right from the Products grid.
Special Event
You can filter and sort your class products by whether they are marked as a special event or not.
Wish List Support
Because of the always changing nature of sessions, specific class sessions cannot be added to customer wish lists, however the class product itself can still be added. The customer can then click on the product from their wish list and choose from the current session offerings.
Class sessions
Sessions are at the heart of Event Management. A session is a combination of a location, instructor and one or more times, creating a unique moment in time and space!
Some classes only offer a single session; others may offer many session options in different locations and at different times. A single session can also consist of a single date and time, or span multiple dates and times
Adding & Editing Sessions
Prerequisites
Locations must be added in advance.
Instructors must be added in advance.
New sessions are added under the “Class Sessions” tab on the product editing page (they can also be imported). Open the tab and press the Add New Session button to create a new session. Once you've created some sessions, you can grab the handle on the left and drag and drop to reorder them. You can also click the trash can icon on the right to delete them.
Under no circumstances should sessions be recycled. If a session date, time or location changes, that’s fine, but reusing one session for a completely different session will only cause headaches.

No changes will be saved until the product “Save” button is pressed.

When creating or editing a session, this is what an expanded session panel looks like:
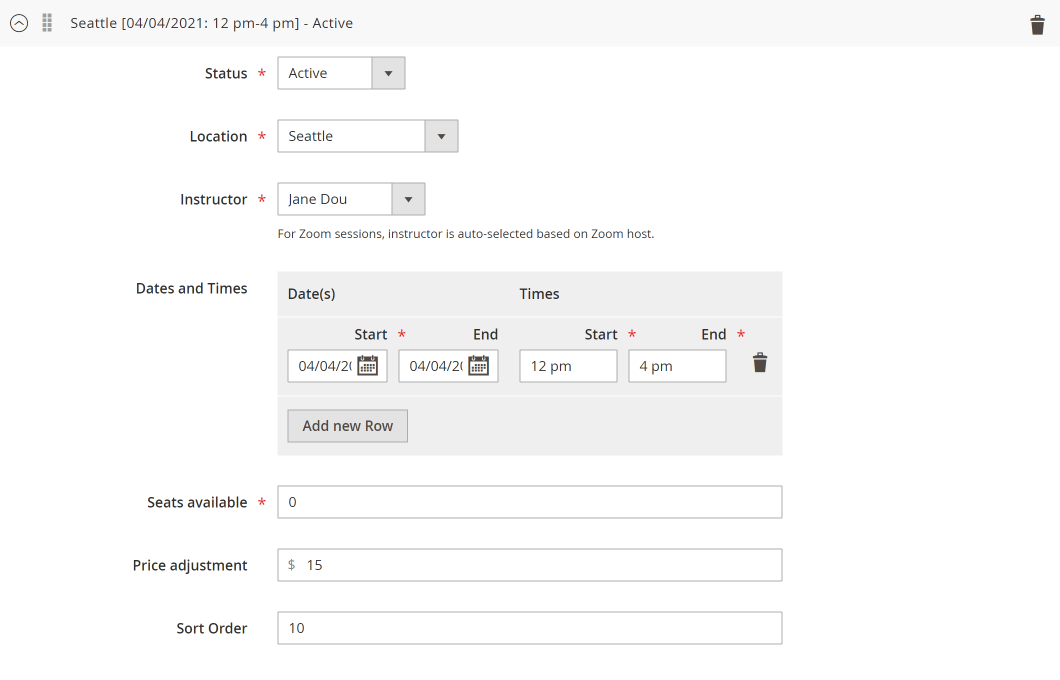
Status
Session status can be one of four states:
Active— session is enabled for registration or waitlisting (dependent upon capacity)Inactive— session is disabled for registration (will not be displayed to customers)Canceled— set session status to “Canceled” to close registration and notify registrants by email (see Cancelations for more details)Completed— session date/time has passed and session is considered complete (set automatically)
The default state is Active.
Store View
If desired, sessions can be limited by store view. Select the Store View in which you want the session to be available. (When Magento is in Single Store Mode this option will not be available.)
Default: All Store Views
Location
A location for the session must be selected from the dropdown list. (The location must be added before it can be selected.) See Locations.
Default: Either the first alphabetical name, or the location selected as the default for importing sessions.
Instructor
An instructor for the session must be selected from the dropdown list. (The instructor must be added before it can be selected.) See Instructors.
Default: Either the first alphabetical name, or the instructor selected as the default for importing sessions.
Dates & times
You can associate as many date/time combinations as you want with each session. It is common for sessions to only have one date and time. Or you may have a session that spans several days, weeks or months. When the session spans more than one date, make sure to add a new row for each date. Unless you plan to keep partying through the night, then by all means, go for it!
The only repitition that is currently supported is consecutive dates. If you need to skip one ore more days in your series you will need to add the non-consecutive dates manually. We hope to add more options for repeating events in a future version.
Seats available
This is the number of spots that will be available for the session. Once this number is reached, registration will be closed, but customers will be able to add their names to a wait list (if enabled) in case any spots open up.
Price adjustment
The base price is set as the product price, but if one session will cost more (or less) than the rest, an adjustment can be entered here. This can be any positive or negative decimal-based integer.
Session notes
You can enter text that may be helpful to the customer and it will be diplayed in parentheses on the front end. For example, you may want to list the day(s) of the week that the class is on. Just don’t get too wordy, or it will clutter the registration options.
Survey
As of version 1.2.3, you have the option to choose which survey will be sent when the session is over. If no change is made, the default survey will be sent.
Default: the default survey chosen in survey configuration.
Deleting Sessions
When you delete a session, the associated roster is also deleted, so be careful. THERE IS NO UNDO! Export or print any rosters you would like to keep before deleting the sessions.
You can delete a session by clicking on the trash can icon in the header of the session panel.

Sessions will not be deleted until the product "Save" button is pressed.

Note that Zoom sessions that have one or more active registrations can only be deleted if the End Date has passed.
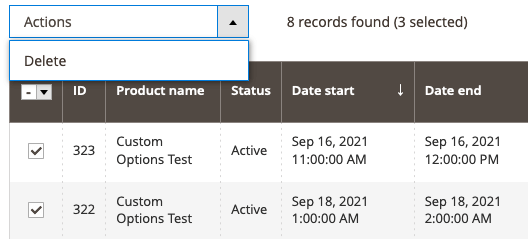
With the proper user permissions, you can also delete sessions in bulk by checking the checkboxes on the Sessions grid next to the sessions you want to delete and choosing Delete from the Actions dropdown menu.
Session changes
As of version 1.0.13, changes to a session’s location, date or time will trigger an automatic email sent to all current registrants notifying them of the change. If a customer has already added the session to their calendar using the “Add to Calendar” link, they will need to remove the old calendar entry and download and import the updated iCal file. A brief notice regarding this as well as a link to the updated iCal file will be included in the session change email.
Session cancelations
To cancel a class session, change the session’s Status to Canceled (see Editing Sessions). When a session is canceled, an email is sent to all current registrants notifying them of the cancelation.
The extension does not initiate refunds. Refunds, if applicable, will need to be manually processed.
Importing sessions
Prerequisites
Class Products must exist before importing.
Locations must exist before importing.
Instructors must exist before importing.
Because of the complexity of adding Zoom sessions, Zoom sessions cannot be imported. If any sessions in your CSV specify a Zoom-enabled location your import will fail.
Sessions can be imported via CSV file. The CSV file contains the following columns and looks something like this:
| CM20-001 | Active | The Colosseum | Horatio Albatross | 1/16/2024 | 11 am | 2:30 pm | 100 | Lunch will be provided | 1 |
Download a Sample CSV
After you’ve prepared your CSV, navigate to Class Manager > Configuration > Import Sessions, select your file, and click the “Import” button to start the import process. If any errors occur, no sessions will be imported; you will be informed of what went wrong so you can fix it and try again.
CSV Notes
- Required fields:
sku,status,location,instructor,start_date,start_time,end_timeandqty. - The
end_datefield is not required since it defaults to the same asstart_date. - Default values can be configured for
status,location,instructorandqtyin which case they can optionally be left blank. - The
price_adjustment,sort_orderandnotesfields are optional and will inherit the same defaults they would when adding/editing sessions manually. - Sessions that span multiple, non-consecutive dates will consist of multiple rows in the spreadsheet. After adding a new row containing the first date of the session, enter the other dates and times on separate rows directly underneath that row (see sample CSV for examples). The
skucolumn must be empty for these subsequent rows to be added to the session. If a SKU is provided the row will be treated as a separate session. - All dates and times must be formatted the same way they are when you add/edit sessions manually.
- Survey selection is not available when importing: the default survey will be used for all imported sessions.
Zoom Sessions
The Zoom video conferencing API was integrated in version 1.2.0 allowing automated management of Zoom meetings, so you never have to touch your Zoom account again!
It provides the following benefits:
Automatically creates Zoom meetings for online sessions (and updates them if the time changes)
Emails with join info are branded and customizable using Magento's built in email template manager
Withholds the Zoom join info from customers until a customizable interval before the session/meeting begins
At the specified time, emails customers the Zoom join link and adds a Join button to their My Classes page on the website
At the specified time (separately customizable from the customer email time), emails the selected instructor the instructions for starting the session/meeting
A single Zoom user license can be shared by multiple instructors
Checks for Zoom host availability to avoid conflicts
Zoom join info is displayed in the Magento backend so there's no need to refer to your Zoom account
Can optionally add registrants as meeting attendees in Zoom and restrict meeting access to only those users
A Zoom account containing at least one Licensed user is required for the Zoom API to work. As of May 2023, a single-user "Pro" license costs $15.99/month or $149.90/year USD.
Configuration
2.0.0 +
1.2.0 - 1.12.0
1) Enable Zoom and enter API credentials
To use the Zoom integration you will first need to connect your Zoom account. Start by expanding the Zoom Sessions panel in the Event Management configuration and setting the Enabled option to Enabled.
Then you'll need to get the OAuth Zoom Account ID, Zoom Client ID, and Zoom Client Secret from your Zoom account.
- Sign into https://marketplace.zoom.us using the credentials of your main Zoom account.
- Go to Develop → Build Server-to Server App in the top menu and create a new app. You can name it "Magento Events".
- In the Information section, provide your Company Name, Developer Name, and Developer Email. (The information added to these fields will not affect the integration.)
- In the Scopes section, click the + Add Scopes button and add:
- View all user meetings (under Meeting)
- View and manage all user meetings (under Meeting)
- View all user information (under User)
- View users information and manage users (under User)
- In the Activation section, click the Activate your app button.
- Paste the values found in the App Credentials section into the corresponding fields (seen above) in Magento.
Once you've completed these steps, go ahead and save your configuration changes. This will allow us to see if the connection was successful. If it was, you'll see green checkmark and a status message similar to this in the Zoom Status field:

1) Enable Zoom and enter your token
To use the Zoom integration you will first need to connect your Zoom account. Start by expanding the Zoom Sessions panel in the Event Management configuration and setting the Enabled option to Enable.

Then you'll need to get the Zoom Token from your Zoom account:
- Sign into https://marketplace.zoom.us with the credentials of your main Zoom account.
- Go to Develop → Build App in the top menu and create a new JWT app.
- In the App Credentials panel of your new app, expand the View JWT Token tab, and select the
Otheroption under Expiration Time. Enter00:00 01/01/2070(or some other date far in the future) into the text field, then copy the generated JWT Token.
After you've saved the token somewhere safe (like a password manager), go back to Magento and enter the token into the Zoom Token field. Once you've done this go ahead and save your configuration changes. This will allow us to see if the connection was successful. If it was, you'll see green checkmark and a status message similar to this in the Zoom Status field:

2) Select a department
Don't be worried if it says 0 host licenses available in the Zoom Status field. This is because we haven't matched the Zoom Users Department field to your users in Zoom. In order for Zoom user accounts to be available in Event Management they must belong to the department entered in the Zoom Users Department field. The department title can be whatever you want (default is Online Events), but only users in your Zoom account who are assigned to that departement will be available in Magento.

You can manage your Zoom users here. To add or edit their department, just press the "Edit" button next to their account.

Once you've added users to the department specified in the Event Management configuration, you can press the "Save" button again in Magento to check the updated number of available host licenses.
Keep in mind that the users in that department also have to have paid licenses. If any of them are on the "Basic" plan, they will not be available in Magento.
2.1.0 +
1.2.0 - 2.0.1
3) Assign Zoom host accounts to instructors
To complete the setup you need to assign Zoom hosts to instructors. To do this, go to Event Management > Configuration > Instructors. You'll see a list of available Zoom host accounts at the top of this page, along with their User IDs
Copy the User ID for the account you want to use and paste it into the Zoom User ID field for each instructor whom you would like to assign to that host account. You can assign a single Zoom User ID to multiple instructors, but you cannot assign multiple Zoom User IDs to a single instructor.

3) Assign Zoom host accounts to instructors
To complete the setup you need to assign Zoom hosts to instructors. To do this, go to Event Management > Configuration > Instructors. Now open your Zoom users dashboard in a separate window so you can copy the IDs of the host users.
To get the user ID(s) from your Zoom account, click on the user's email address for which you want to get the ID. This will open the user's profile. From there, you can copy the user's ID from the URL in your browser's address bar, between user/ and /profile

Once you've copied that string (which sometimes contains hyphens), go back to Magento and paste it into the Zoom User ID field for each instructor whom you would like to assign to that host account. You can assign a single Zoom User ID to multiple instructors, but you cannot assign multiple Zoom User IDs to a single instructor.

4) Choose a location for your online sessions
The final step to enable Zoom session management in Event Management is to create a unique location for them. When you create a new session, the location selection is what determines whether the session will be a regular session or a Zoom session.
To designate a location for Zoom sessions, either create a new location or choose an existing one that doesn't already have regular sessions assigned to it. (If you try to convert a location that already has non-Zoom sessions, you will get an error.) All you need to do is toggle Use for online meetings to Yes.

Though it may not be all that useful, it is possible to have multiple locations enabled for online meetings.
5) Set up your communication preferences
Event Management provides various options for your Zoom session communication preferences. You can find these settings below the Zoom Status in the Zoom Sessions section of the Event Management configuration options.
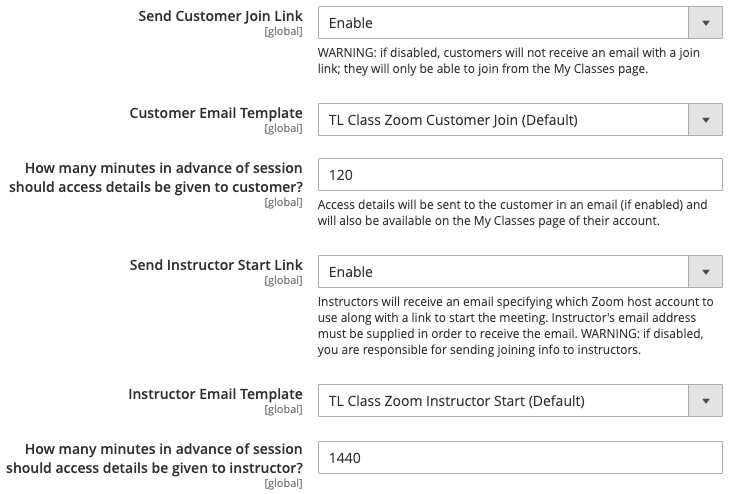
Send Customer Join Link
If enabled, an email will be sent to registrants of a Zoom session containing the information necessary for them to join the Zoom meeting. It is enabled by default.
Customer Email Template
This is the email template that will be used to send the information necessary for registrants to join the Zoom meeting. As with all Magento emails, you may select a customized version of the email template if you have created one.
How many minutes in advance of session should access details be given to customer?
This setting dictates (in minutes) how far in advance of your session start time you want to make the Zoom meeting access details available to your registrants. It dictates when the above email will be sent to the customer, but it also determines when the "Join Meeting" link will become available on the' My Classes page in customers' accounts. The link on the My Classes page will be available regardless of whether the emails are enabled or not. The default is 120 minutes (2 hours) before the session start time.
Send Instructor Start Link
If enabled, an email will be sent to the instructor of a Zoom session containing the information necessary for them to start the Zoom meeting. This is a different link from the join link and requires the instructor to be logged in to the host account before the link will work. It is enabled by default.
Instructor Email Template
This is the email template that will be used to send the information necessary for instructors to start the Zoom meeting. As with all Magento emails, you may select a customized version of the email template if you have created one.
How many minutes in advance of session should access details be given to instructor?
This setting dictates (in minutes) how far in advance of your session start time you want to make the Zoom meeting access details available to your instructor. The default is 1440 minutes (24 hours) before the session start time with the idea being that they will then have time to check their settings and prepare to host the meeting.
Other preferences and settings
Require participants to have a Zoom account to attend
As stated in the note below the setting, enabling this increases the security of your meetings by limiting attendance according to registrants' email addresses, but it places more burden on your attendees by requiring them to have a Zoom account that matches their registration email and be logged in to join the meeting. It is disabled by default.
Zoom Meeting Description
When editing a product, you can specify a value for the Zoom Meeting Description under the "Class Details" tab. This description is only shown when you view your meeting within your Zoom account and if Zoom sends users emails about the meetings. If you've disabled the native Zoom emails then it won't do much, but it's there if you need it.
Zoom settings not available within Class Manager
All other Zoom-related options must be configured in your Zoom account. Here are a couple to note...
Zoom Waiting Room
The option to enable/disable a Waiting Room for your meetings is not available in Class Manager, but can be configured in your Zoom account. We recommend using this feature.
Recording Zoom Meetings
The option to automatically record your Zoom meetings is not available in Class Manager, but can be configured in your Zoom account. (Of course the host can always record meetings even if they're not set to be automatically recorded.)
In a future release, we plan on adding a followup email option that will send a link to the recording (if there is one and it's stored on the Zoom cloud) to all registered participants.
Creating Zoom Sessions
Once everything is all configured, you're ready to start creating your Zoom sessions! Overall, creating a Zoom session is very similar to creating a regular session, but there are some key differences. First of all, due to restrictions of the Zoom platform there are some limitations for Zoom sessions that don't apply to regular sessions:
Zoom sessions can only repeat on consecutive dates and at the same time on each date.
Zoom sessions are limited to 100 participants.
To create a new Zoom-enabled session, first select a Zoom-enabled location from the Location dropdown menu. (As of version 1.2.1, Zoom-enabled locations are highlighted with *ZOOM following the location name.) This will make some slight adjustments to the session creation panel as seen in this side-by-side comparison:

You'll notice that the Instructor field is now disabled; that's because instructors are connected to hosts (see configuration) so we need to choose a host first. In order to choose a host, however, you need to check their availability, so after you've selected the Location you'll jump down to the Dates and Times section.
Enter the date(s) and times of your session and then press the "Check Availability" button. (As noted above, non-consecutive dates are not supported.) The message "In Progress" will show while the check is performed and will change to "Complete" when the check is complete.
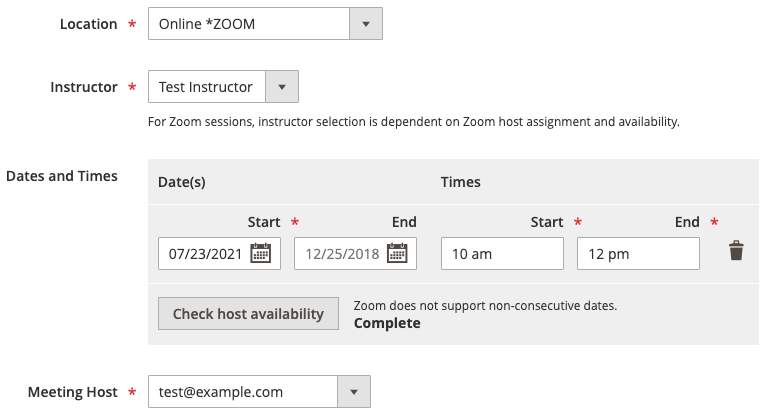
After the availability check has been performed you will then choose one of the available hosts. After that you can select an instructor based on the selected host. Please be sure to rerun the availability check every time you change the date(s) or time(s). If you don't, and there is a conflict, you will get an error and your session(s) will not be saved.
Once you've created your session(s), press the "Save" button at the top of the page to save your product changes. It is at this time that the Zoom meeting will be created and associated with the session. When you view the session creation panel again you'll see that the Zoom meeting link and password have been added, confirming that the meeting was created.

All other settings function the same as they do for regular sessions.
Important Notes
Updating the date or time of your Zoom session in Magento will update it in Zoom, but if you change them in your Zoom account, the changes WILL NOT be reflected in Magento. For that matter, any changes you make in your Zoom account will not be recognized by Magento.
Changing a session's status to Canceled WILL NOT delete the associated Zoom meeting from your Zoom account. If you'd like to delete the meeting to free up the time for another session you will have to go to your Zoom account and delete it there.
Importing Zoom Sessions
Due to the complexity of creating a new Zoom session, importing Zoom sessions is not currently supported. You will encounter an error if any of the sessions in your CSV file are set to an "online" location.
Joining Zoom Sessions
Notifications
Not only are all the usual Event Management emails (registration and waitlist confirmations, reminders, changes, cancelations, and surveys) sent for Zoom sessions, but the Zoom integration adds two customizable emails for delivering the necessary Zoom meeting details to your customers and instructors at exactly the time you want them to arrive.
Tip: Since Event Management sends the emails necessary to join meetings (if enabled) you will likely want to disable Zoom's default meeting notifications so your customers don't receive multiple messages about the same session.
Join Link Email for Customers
This customizable email will contain the session title (with a link to the class page), date(s) and time(s), and the necessary link (as well as Meeting ID and Password) to join the Zoom meeting. Here is an example using the default template:
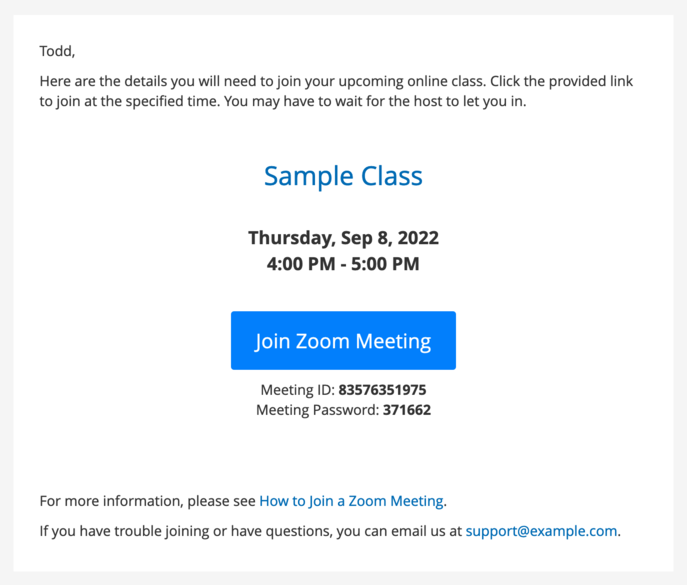
The timing of this email can be configured in the extension settings. The default is 120 minutes (2 hours) before the session start time. If someone registers after the configured send time, they will receive the email immediately upon registering.
As of version 1.2.1, a "Confirm email address" field can be added to the class registration form on the front end. This should reduce the number of mistyped email addresses.
Start Link Email for Instructors
Very similar to the "Join Link" email for customers, this email is sent to the instructor of the class informing them of which Zoom user account they will be using and providing them with a link to start the Zoom meeting. If they are already logged into that Zoom account all they will need to do is click on the "Start Zoom Meeting" button in the email. Here is an example using the default template:
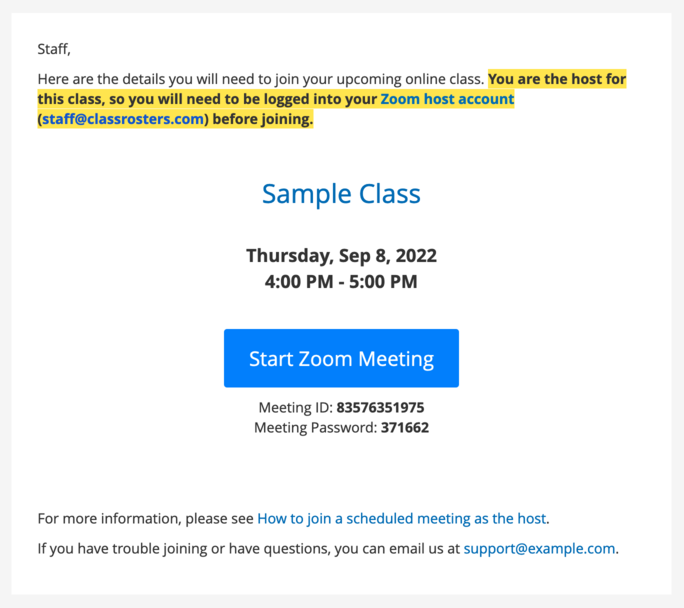
The timing of this email can be configured in the extension settings. The default is 1440 minutes (24 hours) before the session start time to allow them plenty of time to check their settings and prepare to host the meeting.
IMPORTANT: This email will be sent to the instructor's email address, so make sure their email address is valid and up-to-date in their instructor record. Also note that the password for the Zoom host account is not included in this email; you will be responsible for securely sharing that with the instructor ahead of the scheduled session time.
Other ways to join Zoom sessions
Customers can find a link to join the Zoom meeting on the My Classes page in their account. Before the link is available the button will be disabled and there will be a note about the availability:

After the link is available, the button will be enabled and the Meeting ID and Password will be shown:

Instructors can find the link to start the Zoom meeting at the top of the session roster in the back end:
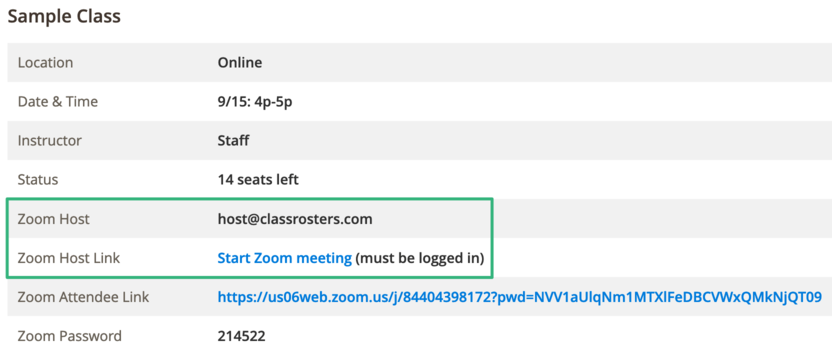
Sessions grid
The Sessions grid can be accessed from the main the extension’s menu and shows a list of all sessions across all products. Here you can search and sort them, see which ones are full, and even make changes to them directly from the grid.

- ID — A unique ID that can be used to reference the session
- SKU — The SKU of the class to which the session belongs (sessions do not have their own SKUs)
- Class Title — The name of the class to which the session belongs
- Status — The session status (Inactive, Active, Canceled Complete)
- Start Date — The date and time the session starts
- End Date — The date and time that the session ends (if the session has multiple dates, it will be the end time of the last date)
- Date(s) — All dates/times in the session
- Created — The date and time when the session was created
- Instructor — The instructor of the session
- Location — The location at which the session will take place
- Seats — The total number of seats/spots in the session (capacity)
- Capacity — Shows the percentage of registrations vs. capacity
- Notes — Any session notes will show up in parentheses on the front end
- Price Adj — Any adjustment to the base price for individual sessions
- Zoom Host — The Zoom user selected to host the Zoom meeting (only applicable to Zoom sessions
- Survey — The name of the selected survey that will be sent to session participants when the session is complete
- Action — Pressing “Edit” will take you to the class page to edit the full session details
- Roster — Pressing “View” will take you to the roster for that session
Columns
You can sort columns, drag-and-drop the column headers to reorganize columns, and you can show/hide the columns in the grid using the "Columns" manager.
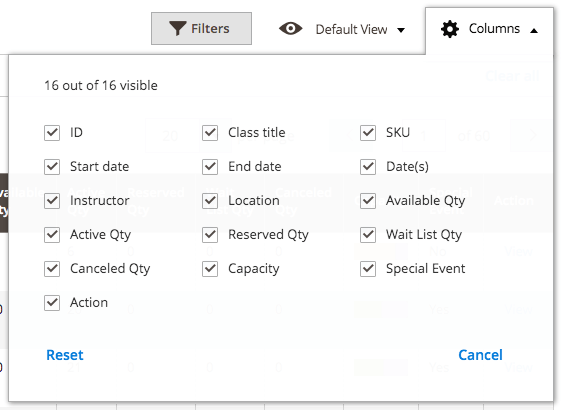
Views
Once you have the columns the way you want them, you can save your column views using the “Views” menu so you can easily switch between views.
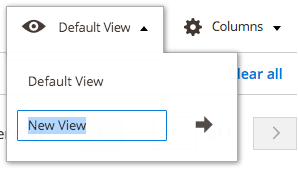
Filtering
You can filter the sessions by pressing the “Filters” button, filling in/selecting the filters you want, and pressing the “Apply Filters” button. Clear all filters by pressing the “Clear all” link.
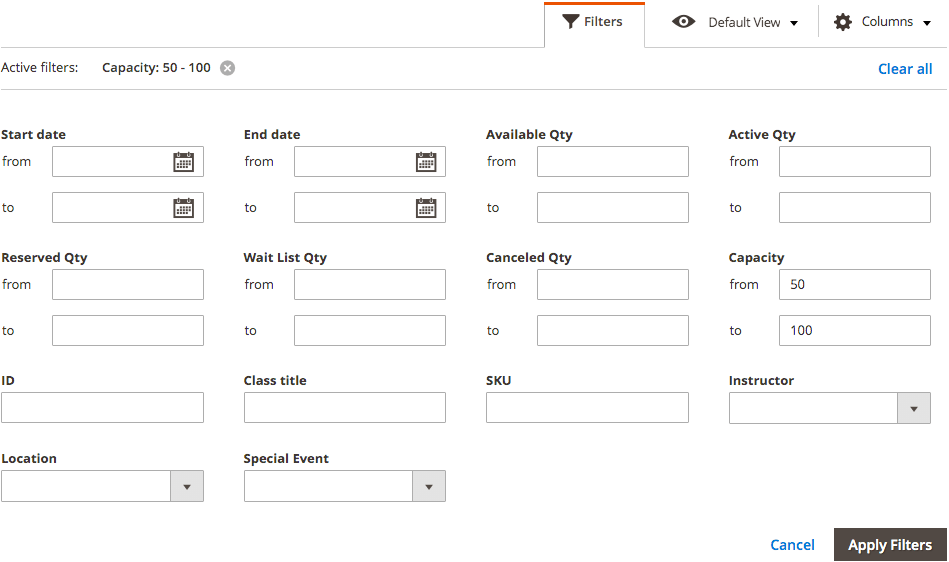
Quick edits
The coolest part of the grid is being able to edit certain session details right from the grid (requires permission) without having to open the product for editing! When you click on a row, it’s selected and some of the fields become editable.

You can change the Status, number of Seats, Notes, Sort Order and Price Adjustment. This is especially handy when you have a class that has reached capacity and you want to add another seat or two to maximize your revenue. You can adjust the number of seats in a couple of seconds and the Capacity percentage updates accordingly.
Viewing Classes on the Front End
Classes and events are viewable just like any other product on the front end either by catalog navigation or search. Location and instructor filters are added to layered navigation for filtering classes and advanced search as well as product comparison.
Product Details Page
The product details page (PDP) looks mostly the same as it would for simple products, with the following exceptions:
- A Registration block is added displaying available sessions to choose from.
- The Add to Cart button is replaced with a Register button.
- If no sessions are available the button will be replaced with a styled text block reading Registration not available.
- If there are related products, they will be moved from their usual place to the registration form (some themes may still include them elsewhere). See Related Products for more details and an example.
- Depending on your configuration, additional product tabs may be added to display information about the session instructors, or display the class or event policy text.
Special Notice
If needed, a global "special notice" can be configured to be displayed at the top of all class product pages (above the product name). Both the content and style are completely customizable using the WYSIWYG/HTML editor in the Event Management configuration. Here are a couple of examples:

Catalog and Search
When a class product is displayed on product listing pages (PLP), the Add to Cart button is replaced with a Register button which links to the class PDP to select which session to attend.

Calendar View
For a convenient way to find classes and events by date and location, Event Management adds a filterable calendar view to Magento.
Event Management uses native calendar functionality to display all of your sessions by date. You can choose month, week or day views on a navigable calendar. The calendar can also be filtered by location.
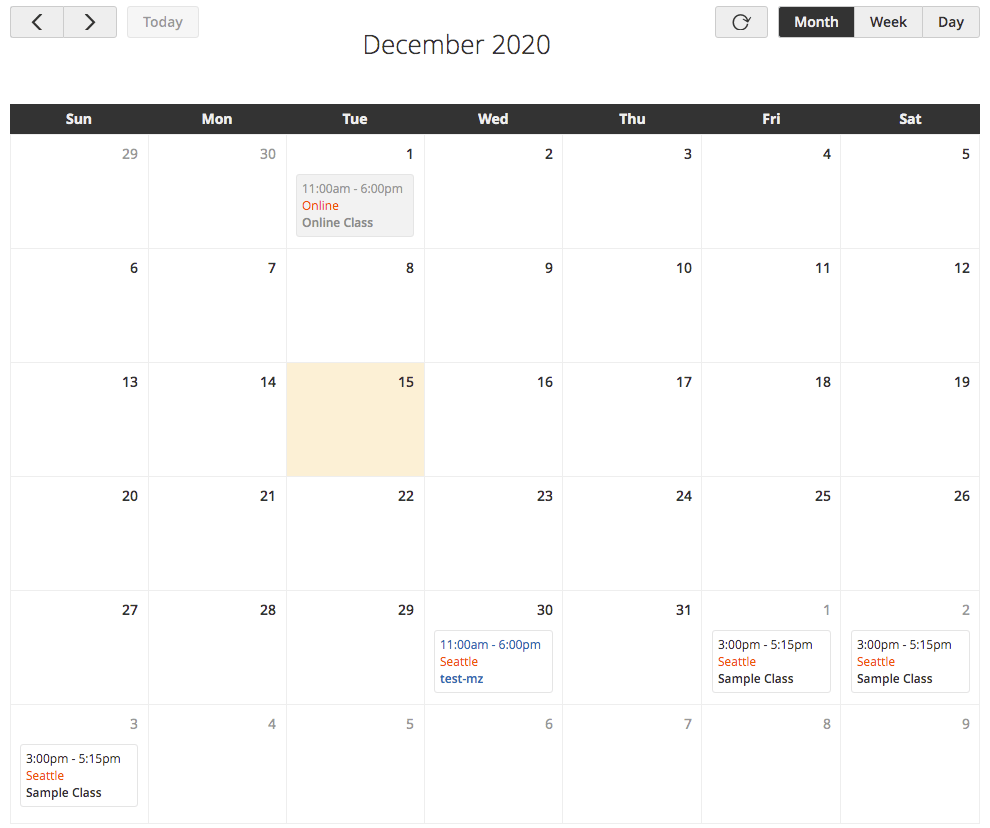
Events that are in the past, full or canceled will be displayed differently (grayed out) on the calendar to indicate that registration is not available for them. Today's date is highlighted as well.
When a customer hovers over an event, additional details like status, instructor and session series (session x of x) are shown:
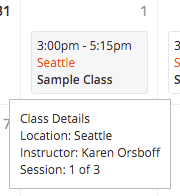
When a customer clicks on an event on the calendar, it opens the product page for registration. If desired, you can set the registration form for the selected session to open automatically when the page loads. See configuration.
Special Events on the Calendar
Events marked as a "Special Event" on the backend will be highlighted on the calendar to separate them from normal classes and events. This, like all calendar styles, can be modified according to your theme.

Location Filter
By default, the calendar shows all locations, but you can add additional, location-specific calendars by setting Filterable to Yes when setting up your locations.

Each filterable location will also have its own unique URL based on the Code field in the location settings.
When viewing a location-specific calendar, the name of the filtered location is hidden for those sessions.
Calendar "Merging"
As of version 1.2.1, you have the option to show select locations on all calendars, regardless of the filter. This is useful if, for example, you want to show online events for all locations since they can be attended from anywhere. To show a location's sessions on all calendars, set the Show on all calendars setting to Yes for the chosen location.

When this option is enabled, the location will be noted for sessions at these locations when viewing other locations' calendars.
Custom Events
Because calendars can be useful for conveying all kinds of information, we've included the ability to add custom events to your calendars.
To view existing custom events and create new ones, access the Custom Events Grid by navigating to Class Manager > Calendars > Custom Events.

To create a custom calendar entry to be displayed on the calendar, press the "Add New Event" button at the top of the grid. You will be presented with the following options:
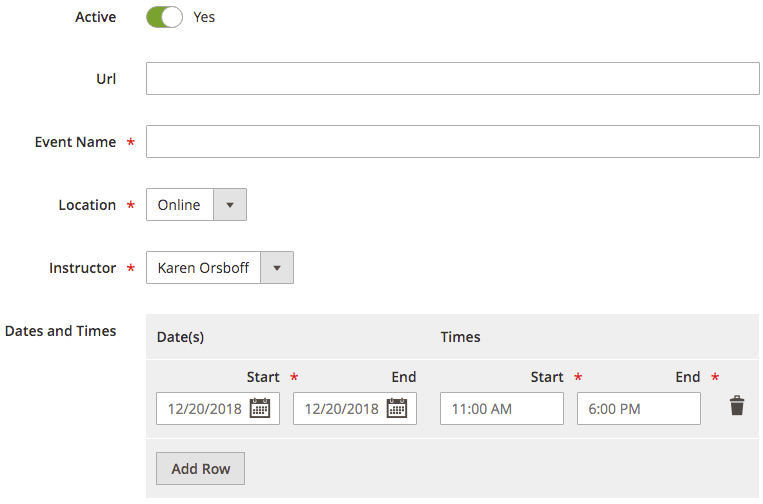
Active
Yes will display the event on the calendar; No will hide it.
URL
f a URL is supplied, the event will link to that page. If the field is blank, the event will not have a link.
Event Name
This text will show on the calendar in the space where the class or event title would be.
Location
Just like sessions, the custom event must be associated with a location. The location is used to determine on which calendars the event will be included and will also be displayed on the main "all locations" calendar underneath the Event Name.
Instructor
Just like sessions, the custom event must be associated with an instructor. If it is a general announcement, such as a store closure, you may want to assign it to a "Staff" (or similar) instructor. Instructor name is only shown when you hover over a calendar entry and is not visible by default.
Dates and Times
Just like sessions, date(s) and time(s) must be provided for the custom event in order to determine where to display it on the calendar. See Session Dates and Times.
Deleting Custom Entries
For database maintenance, it is recommended to occasionally clean out your old custom calendar entries. You can do that in bulk from the Custom Events grid by selecting all events to be deleted and then selecting "Delete" from the "Actions" dropdown menu.
Printing Calendars
The calendar view contains a specialized set of CSS that hides page elements to allow for easy printing of calendar events for in-store display or other uses. Just choose File > Print from your browser menu or press Ctrl + P on a PC or Command + P on a Mac to print the page.
Compatibility with your theme cannot be guaranteed. Additional CSS may be required.
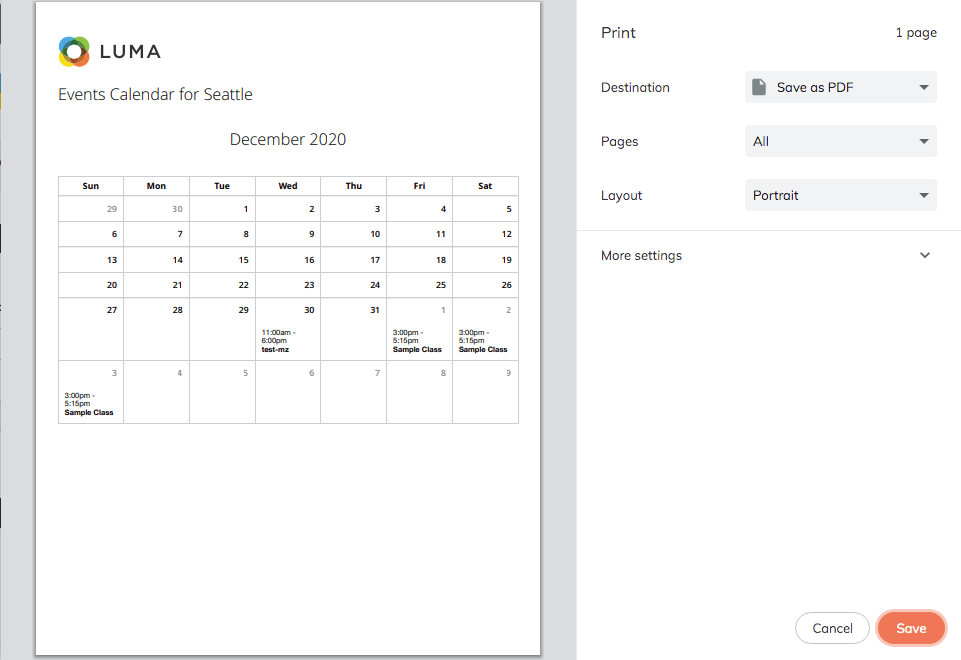
Registration
Customer registrations
Event Management for Magento 2 makes it easy for your customers to register for classes and events on your website. If they have an account on the site they'll also be able to view their upcoming classes, past classes and waitlisted classes.
Registering for a Session
To register for a session, the customer will:
- browse the calendar, categories or search to find the class or event they want;
- select the session they want to register for from the list of available sessions and press the "Register" button;
- enter their contact details (if they're not already auto-filled from their account info), select any session options, and press the “Add to Cart” button;
- proceed to view their cart and check out by either pressing the "View cart" button or closing the overlay and going to checkout using the cart icon in the header;
Emails
Event Management has many emails available to help you communicate effectively with your customers. You can enable and disable them individually and they all have customizable templates.
- When they register for a session they'll receive a registration confirmation email.
- If they're waitlisted for a session they'll receive a waitlist confirmation email.
- When the first date of their session is approaching they'll receive one or more reminder emails.
- If the location or date/time changes for a session they're registered for, they'll receive a session change email.
- If a session they've registered for is canceled, they'll receive a cancelation email.
- If they're registered for a Zoom session using the Zoom integration, they'll receive an email with the necessary information to join the Zoom call.
- After their session has completed, they'll receive an email requesting their feedback.
For more information, head over to the Emails documentation.
My classes page
If a customer has an account, or creates an account, on the website they'll be able to log in and view their "My Classes" page which lists all of their upcoming and waitlisted classes as well the last several months of their past classes.

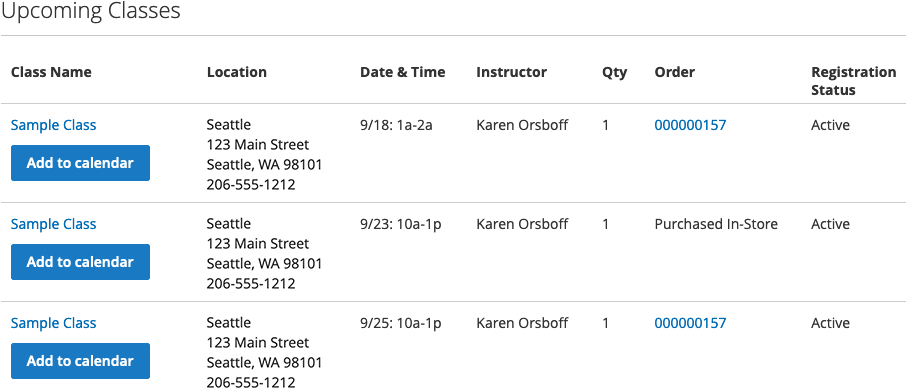


Classes Dropdown
Customers can also quickly view their next few upcoming classes in a handy dropdown menu in the header ribbon of every page, right next to their name. (Theme compatibility varies.)

Employee registrations
Employee registrations (often called "in-store registrations") are a central feature to businesses that also operate retail locations. A customer may come into the store or other location wanting to sign up and pay for a class at the same time — and in the same transaction — that they make a physical purchase, and this system allows store employees to do just that.
Prerequisites
- The In-Store Payment module must be installed and enabled.
- A module for restricting payment methods by customer group must be installed.
- One or more customer groups must be created to which all store accounts will be assigned.
- The customer group(s) must be selected for in-store registrations in config settings and also configured for access to the In-Store Payment method.
- Magento customer accounts (either one per store, one per register, or one per employee) must be created for employees and assigned to the selected customer group(s).
Registering a Customer for a Session
How to register a customer for a class using your in-store account:
- If you’re not already signed in, sign into your store account using the link in the header.
- Browse or search to find the class the customer wants to register for.
- On the product page, scroll down to find the available sessions.
- Select the session the customer wants (if it’s available) and press the “Register” button.
- A popup appears with the registration form.
- Enter the customer’s contact details, being very careful to enter their correct email address, fill out the rest of the form, and press the “Add to Cart” button.
- A confirmation appears when the registration has been added to the cart giving you the option to either view your cart or register another customer for the same session. If you’re ready to check out, either press the “View cart” button or close the overlay and go to checkout using the cart icon in the header.
- Check out using the standard checkout process. You can take payment from the customer at this time, or, if you have already received payment from the customer using your in-store POS or other system outside Magento, choose the “Payment Taken In-Store” option which will not require additional payment details.
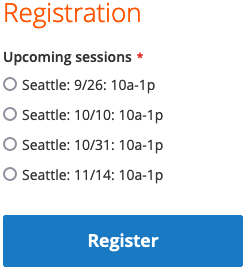

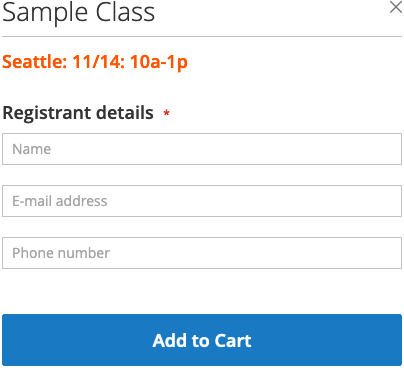


Training video created for Meissner Sewing:
What happens after I register a customer?
Obviously the registration will be added to the class or event roster in Magento. In addition — if the customer's email address was entered correctly — glorious, almost magical, things will happen!
- An email will be immediately sent to the customer’s email address confirming their enrollment. The email contains:
- Registrant’s name and contact info
- Name of class
- Date and time of class
- Location of class, including address and phone number
- Instructor name
- Link to add the event to their calendar (if enabled and supported by template)
- Links to download the supply list (if applicable and enabled and supported by template)
- Class Policy (if provided in configuration and supported by template)
- If the customer has an account on the site using the same email address (or even if they create a new one afterwards using that email address), the registration you just created will be visible on their My Classes page. (Letting them know this will encourage them to create an account on your site if they haven't done so already.)
- The customer will receive all class-related emails (reminders, changes, cancelations, Zoom links, survey requests, etc.) just as though they had signed up themselves.
Wait list signups
Customer signup
If a session has reached capacity, customers can be added to a wait list for the class so that they may be contacted once more spots open up. If a class session is full a link to get on the wait list will be shown for the session.

For a customer to add themselves, they simply press the “Get on the wait list” link. If they are not logged in, they will be asked to log in (or create an account if they don't have one). They will then be able to select the quantity of wait list spots as well as add any comments.
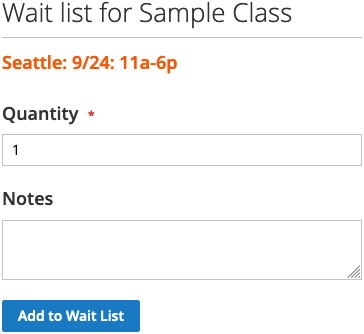
The customer’s wait list entries will show up on their My Classes page.

Customers can manage their wait list entries by clicking on the class name on the My Classes page (or otherwise navigating to the class page) and clicking the “Get on the wait list” link again. When the form appears they will be able to either update their wait list info (adjust quantity, add notes...) or they will also have the option to delete their wait list entry using the “Delete” button.
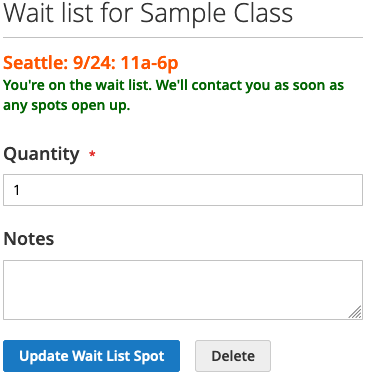
In-store (employee) signup
The process for an employee to add a customer to a wait list is almost identical. The difference is that you will enter the customer’s name and contact info into the Notes field.
To add more than one customer, adjust the quantity and add their name and contact info to the Notes field, while also retaining the info for existing customer(s), and press the “Update wait list spot” button.

Classes waitlisted using a store employee’s account will not show up on the customer’s My Classes page, however they will show up on the store’s My Classes page.
Note: we recognize that this is not an ideal method for in-store wait list signups and are working to implement a better system. Your feedback is welcome.
How to use wait list entries
Rosters
Rosters grid
The Rosters grid can be accessed from the main menu of the extension and, similar to the Sessions grid, shows a list of all sessions. You can find the roster you’re looking for by searching and sorting them, then press “View” (or just click in a row) to view individual rosters.

- ID — A unique ID that can be used to reference the roster
- Class Title — The name of the class
- SKU — The SKU for the class (product level)
- Start Date — The date and time the session starts
- End Date — The date and time that the session ends (if the session has multiple dates, it will be the end time of the last date)
- Date(s) — All dates/times in the session
- Instructor — The instructor of the session
- Location — The location at which the session will take place
- Available Qty — The total number of seats/spots in the session (capacity)
- Active Qty — The number of registrants who have enrolled in the session and paid for it
- Reserved Qty — The number of registrants who have enrolled in the session but whose payment is pending
- Wait List Qty — The number of customers on the wait list for the session
- Canceled Qty — The number of registrants whose registrations have been canceled (order refunded or status changed)
- Capacity — Shows the percentage of registrations vs. total capacity
- Special Event — Shows whether the session is designated as a Special Event (can be useful for finding rosters for special events)
- Action — Pressing “View” will take you to the roster for that session
Columns
You can sort columns, drag-and-drop the column headers to reorganize columns, and you can show/hide the columns in the grid using the “Columns” manager.

Views
Once you have the columns the way you want them, you can save your column views using the “Views” menu so you can easily switch between views.

Filtering
You can filter the sessions by pressing the “Filters” button, filling in/selecting the filters you want, and pressing the “Apply Filters” button. Clear all filters by pressing the “Clear all” link.

Registrations
Session rosters
A roster is a view of who is registered for a class session. Rosters can be accessed in the following ways:
- from the Rosters Grid,
- from the Sessions Grid, or
- from the “View Roster” link on a customer’s order (see below)

When you view a roster, you'll see the Class name, location, date & time, instructor and number of seats at the top. There are also a couple of helpful buttons:
- Edit Session — This will take you to the product page so you can edit session details.
- View Registration Page — This will take you to the registration page on the front end, in case you want to register someone.

Registrations grid
Below the header is the Registrations grid which lists all participants for a session.
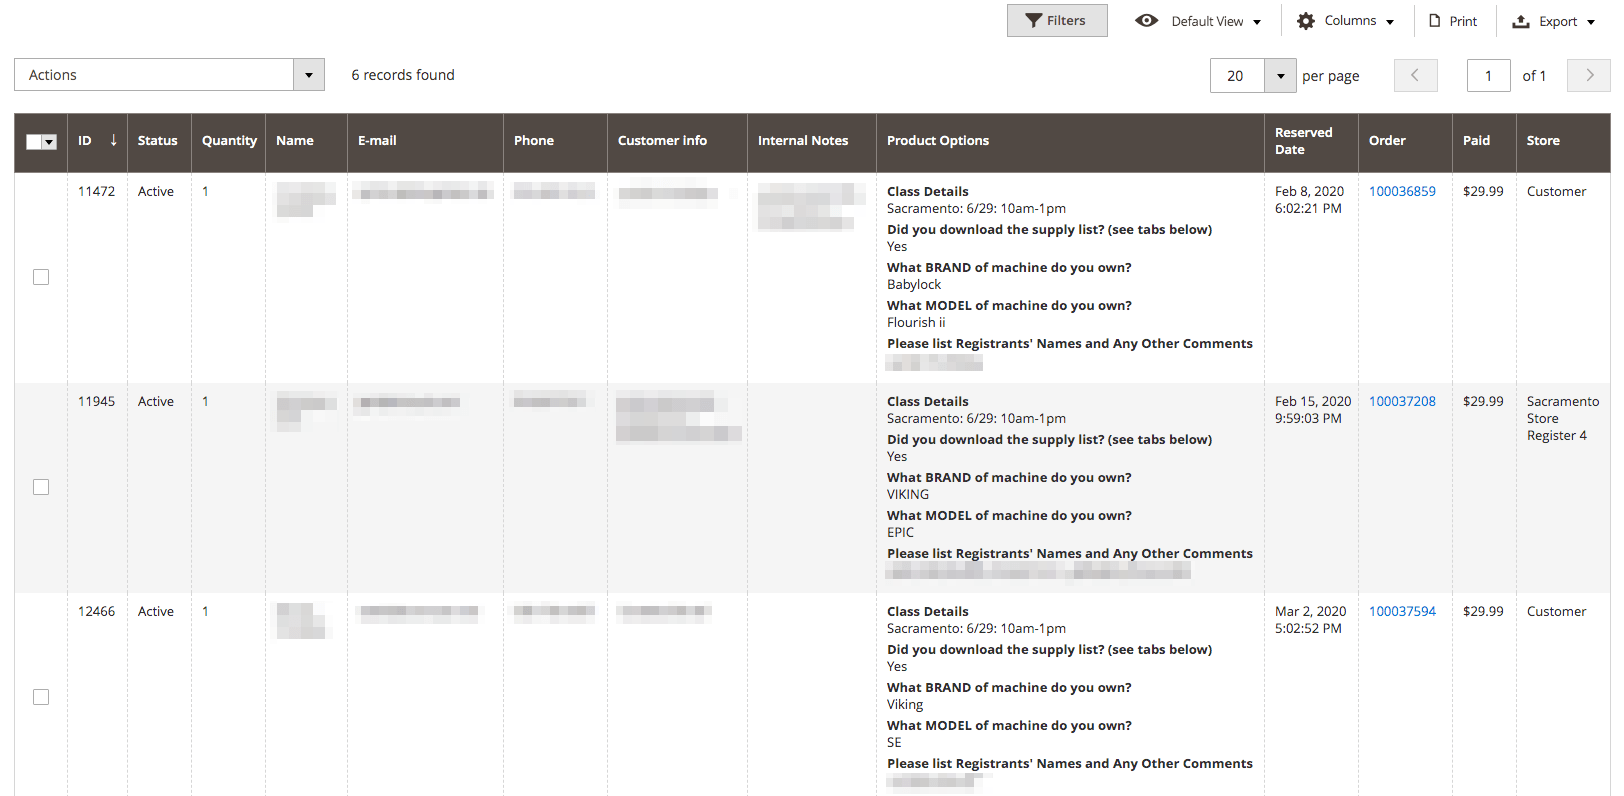
- ID — A unique ID that can be used to reference the registration
- Status — The registration status (Active, Reserved, Canceled, Wait List)
- Quantity — The quantity registered
- Name — Customer name
- E-mail — Customer e-mail address
- Phone — Customer phone number
- Customer Info — Customer comments (entered when registering)
- Internal Notes — Internal notes (entered on roster)
- Product Options — Custom options associated with the class
- Reserved Date — Date the order was placed
- Order — Order number containing the registration
- Order Status — Status of the order containing the registration (added in 1.7.1)
- Paid — Paid amount
- Customer — Customer ID
- Store — Who purchased the class (customer or store)
Note: the “Actions” dropdown menu may be unavailable depending on your permissions.
Pagination
Please be aware that Magento 2 paginates grids, so some entries may be “hidden” on other pages.
In order to view all entries at once you can set the number per page to the maximum: 999. This usually “sticks” from roster to roster, but it doesn't hurt to check and make sure that you’re viewing all entries and not just the first 20 (which is the default).

Columns
You can sort columns, drag-and-drop the column headers to reorganize columns, and you can show/hide the columns in the grid using the “Columns” manager.
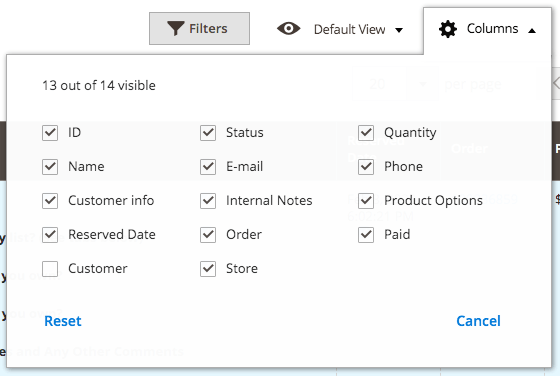
Views
Once you have the columns the way you want them, you can save your column views using the “Views” menu so you can easily switch between views. For example, it may be helpful to save a “Print” view for printing rosters.
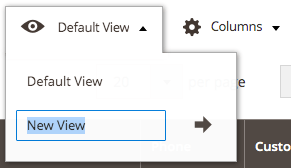
Keep in mind that number of records per page is also saved with your view, so make sure you save your view with your preferred number of records per page.
Filtering
You can filter the grid by pressing the “Filters” button, filling in/selecting the filters you want, and pressing the “Apply Filters” button. Clear all filters by pressing the “Clear all” link.
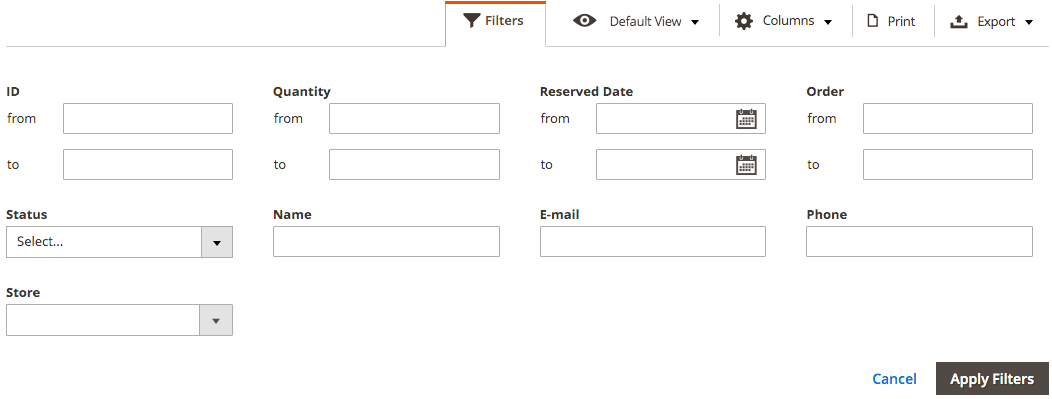
The Status, Order Status and Store filters on this grid allow you to select multiple values at once. So, for example, if you want to show both Active and Wait List entries, you can do that!
Filters are only available for active columns. If a filter is missing, toggle the column visibility and try again.

Editing registrations
To edit a roster entry, click on a row and it will become editable. Make your changes and then press the “Save” button.

Editable fields
Restrictions
There are two levels of editing permissions: Limited and Full. Certain fields require Full permissions to edit. Permission level has been notated next to each field.
Bulk Edits
If attempting to edit multiple entries at once (changing registration status, for example), make sure the Action column (added in 1.10.0) is visible on the grid before selecting 'Edit' from the 'Actions' dropdown menu. If it is not visible, you will be unable to save your changes.
Status Full
The registration status can be updated. Possible options are:
Active— The customer has registered for the class and plans to attendReserved— The customer has reserved their spot, but has not yet paid for itCanceled— The customer will no longer be attendingWait List— Designates a wait list entryAttended— The customer attended the class (requires manual change)No-Show— The customer did not attend the class (requires manual change)
Note: RegistrationStatuscannot be changed fromWait ListtoActiveunless there is an order associated with the entry.
Status changes are recorded as a comment on the associated order:

Quantity Limited|Full
The quantity of a registration can be changed as long as there are seats available in the class. If the class is full, unless you edit the session to increase the number of available seats (or cancel or reduce the quantity of another registration), you will only be able to adjust the quantity down.
Note: If theQuantityis changed to0, theStatusof the registration is also changed toCanceled, however changing the Quantity from0to1does not automatically return the registration status toActive. Status must be updated manually.
Status changes are recorded as a comment on the associated order:

Name Full
Customer name can be updated in case of typo.
E-mail Full
Customer email can be updated in case of typo.
Phone Full
Customer phone number can be updated in case of typo.
Customer info Full
Customer comments can be updated.
Internal notes Limited|Full
Internal notes can be added.
Printing registrations
The extension brings more flexibility to roster printing. Now you can filter and sort entries as well as hide columns you don't need.
Before printing, double-check your pagination to make sure all entries are visible. Only the visible entries will be printed.
This is where Views are really handy. You can save a “Print” view which just shows the columns you want on your printouts and then easily switch back and forth between a more detailed view and your slimmed-down “Print” view. Once you've created your “Print” view and have selected it using the Views menu, press the “Print” button. A popup window opens*, displaying only the roster isolated from other elements that shouldn't be printed. You can then press Ctrl + P on a PC or ⌘ + P on a Mac to print the window.

*If you don't see the window open, make sure your browser isn't blocking it.
Exporting registrations
Rosters can be exported to a CSV file. You can apply any filters you want to the registrations table and when you’re ready to export, press the “Export” menu button and then the “Export” button which appears in the dropdown.

You will then be prompted to save the file to your computer where you can open it in the application of your choice.
Note that column sorting and hiding does not apply to exports. All columns are exported whether they are visible or not.
Wait lists
Viewing wait list entries
You can see if anyone is wait listed for a session by looking in the “Wait List Qty” column on the Rosters grid. If you would like to view all classes that have a wait list you can filter the Rosters grid by sessions with a Wait List Qty of 1 to 999.
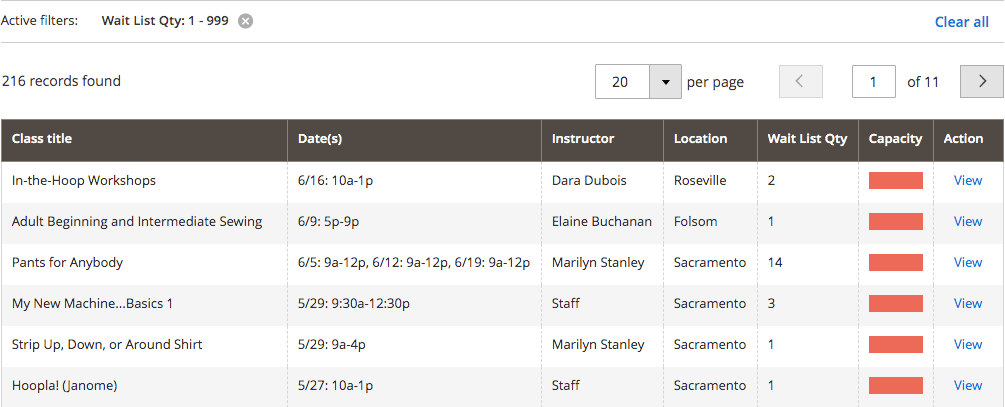
When viewing a roster, Wait List entries will be highlighted in pink and you'll usually find them towards the bottom. Although, depending on your sorting method, they may show up at the top or even in the middle of other roster entries.)

The wait list entries will show the customer’s contact information as well as how many spots they would like to register for, the date on which they made their request, and any comments they may have provided. (If the Include session options in wait list form setting is enabled, it will also show the answers they provided to the extra session questions.)
Managing wait list entries
Because every registration requires an order to be associated with it, wait list entries cannot be directly converted to registrations. You will need to contact the customer letting them know that one or more spots have become available and they can now register for the class through the website, or you can register them on their behalf using the employee registration method. Once they have registered for the class, either you or the customer will need to manually delete their wait list entry; it is not done automatically. On the back end, all of the same fields that can be edited for registrations can be edited for wait list entries. Please see the Editing Registrations documentation for instructions on editing wait list entries.
We are searching for better ways of handling this. Current ideas include an automated email which will notify wait listed customers when spots open up. Another idea we are considering is to utilize a backorder system where orders could still be placed even when there is no availability for a session and those orders would be assigned the “Wait List” status. You would then have to cancel and refund the order if they are unable to attend. Your feedback is welcome.
Customers can also manage their own wait list entries from the My Classes page in their account.
Attributes
Locations
Locations, also known as venues, are the places where your classes and events take place. Locations must be added before creating or importing sessions.
Locations Grid
The Locations grid lists all of the locations that you've added to Event Management. It can be accessed from the main Event Management menu. You can filter the grid by Name, Code, Phone, and Email.
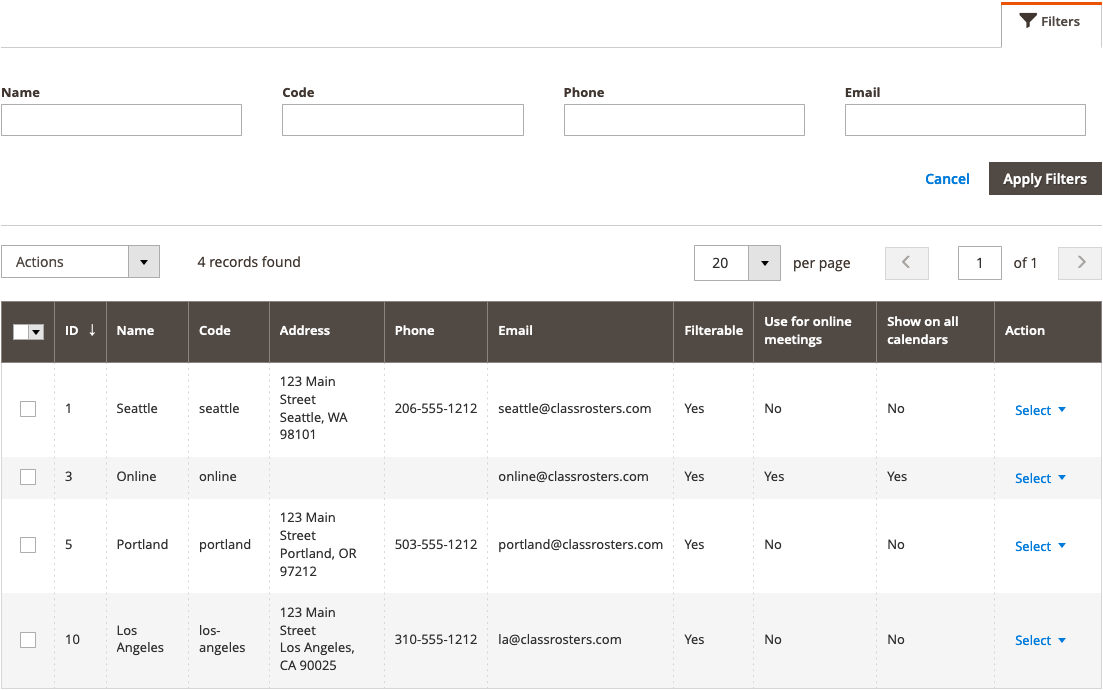
By choosing an option from either the Actions column on the grid, or by selecting multiple records and choosing from the options in the Actions dropdown menu above the grid, you can edit or delete one or more locations. Other options for editing are to simply click on the row of the location you want to edit and edit it right on the grid:

Adding a Location
Press the "Add New Location" button at the top of the page to add a new location.
You will see the following screen when adding (or editing) a location:
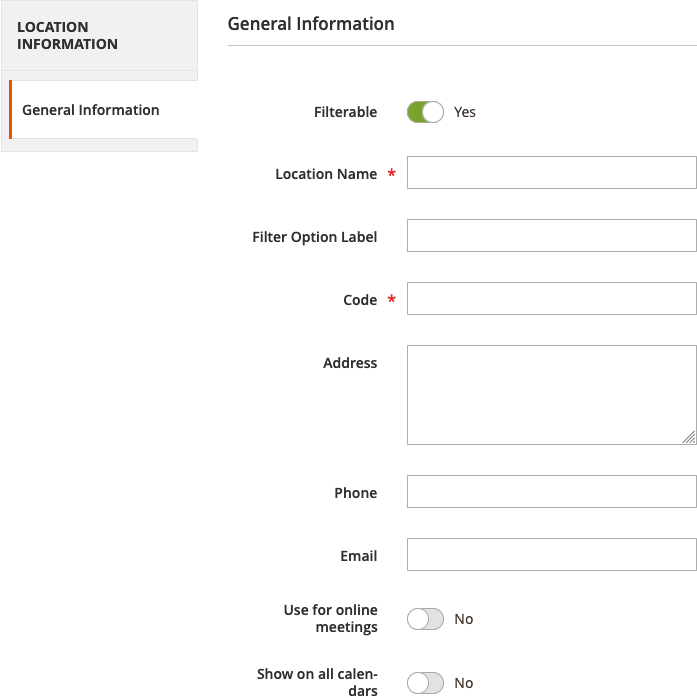
Filterable
Setting this to Yes will create a location-specific calendar on the frontend of the website which will show only sessions available at this location (along with locations chosen to show on all calendars). If set to No sessions for this location will be shown on the "all locations" calendar, but there will be no location-specific calendar for this location.
Location Name
This is where you enter the name of the location or venue.
Filter Option Label
If you would like the location filter option on the calendar page to have a different name than the main location name, enter it here. Most of the time, this field will be empty in which case the main Location Name will be used.
Code
This is essentially a URL Key. The filtered calendar view will be visible using this code in the URL. We recommend following best practices of using only lowercase characters with hyphens to separate words. Avoid spaces or other special characters.
Example frontend path: /event-management/events/calendar/location/{code}/
Address
This is the location's physical address. If provided, it will be included in emails to the customer.
Phone
This is the location's phone number. If provided, it will be included in emails to the customer.
This is the location's email address. This field is not currently used.
Use for online meetings
Setting this to Yes will designate the location to be used for Zoom sessions. The Zoom API must be activated and configured in order for Zoom functionality to be available.
Show on all calendars
Setting this to Yes will show sessions at this location on all calendars, regardless of the location filter.
Location Calendars
Event Management comes with native calendar support for your locations and sessions, allowing your customers to filter sessions by location. For more information about calendars, head on over to the Views & Calendars documentation.
Instructors
An instructor is the person leading a class or event. Instructors must be added before creating or importing sessions.
Instructors Grid
The Instructors grid lists all of the instructors that you've added to Event Management. It can be accessed from the main Event Management menu. You can filter the grid by Name, Email, URL Key, Include in Instructor List, and Zoom User ID.
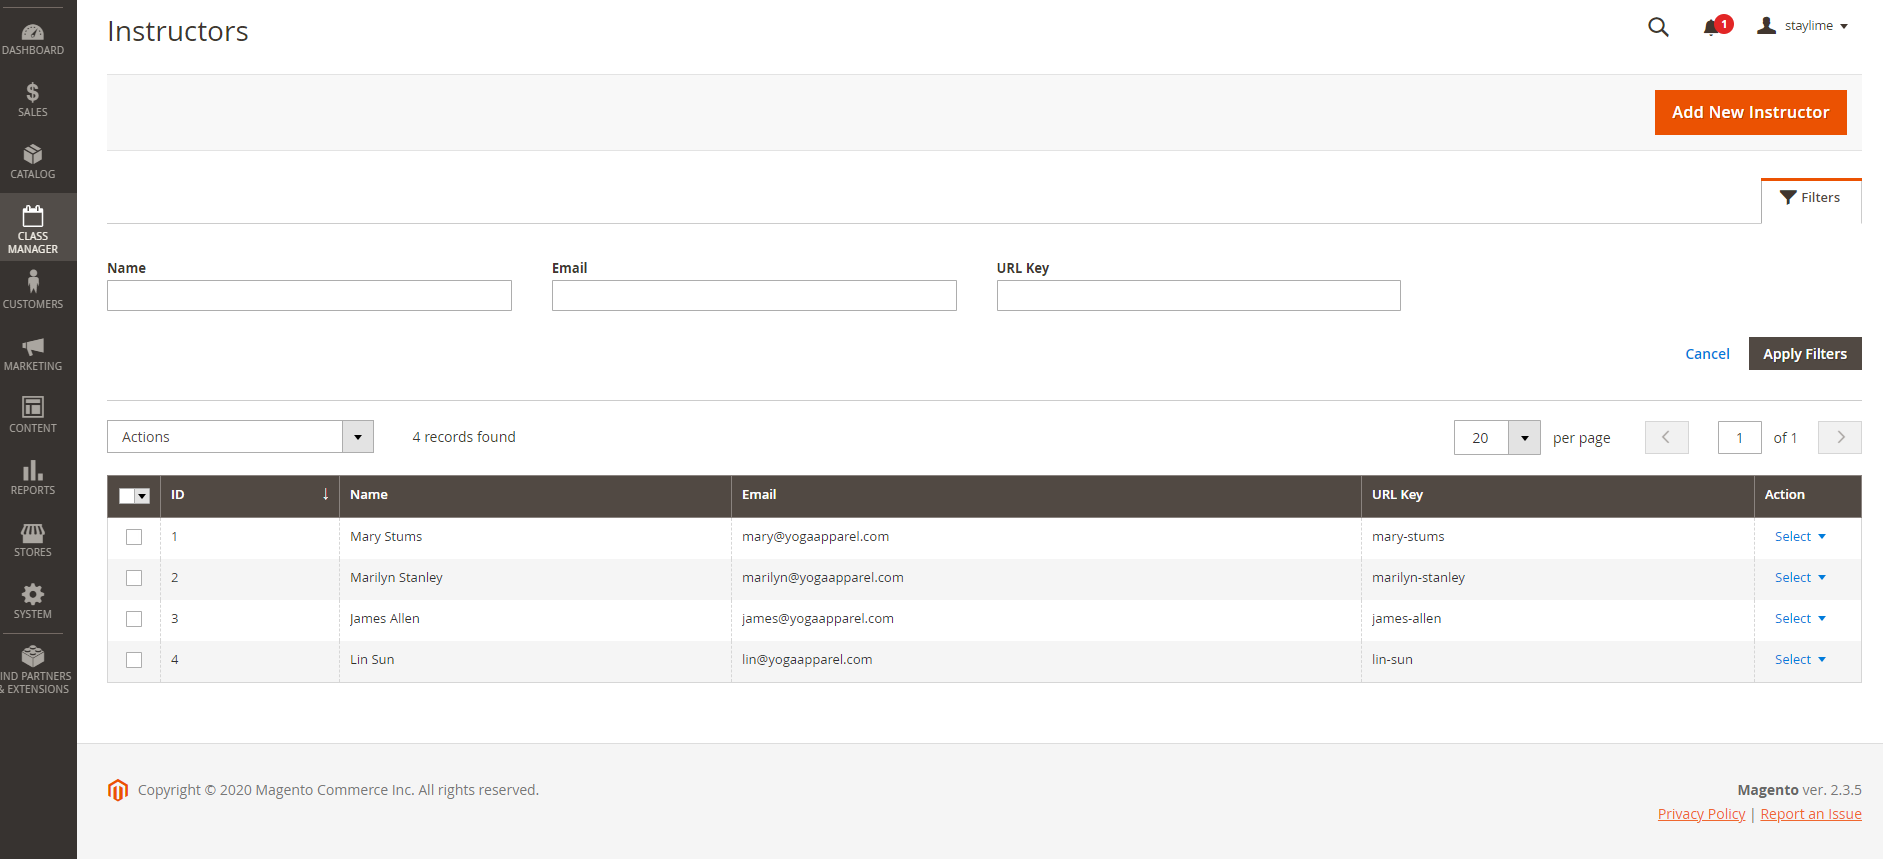
By choosing an option from either the Actions column on the grid, or by selecting multiple records and choosing from the options in the Actions dropdown menu above the grid, you can edit or delete one or more instructors. Other options for editing are to simply click on the row of the instructor you want to edit and edit it right on the grid:

Adding an Instructor
Press the "Add New Instructor" button at the top of the page to add a new instructor.
You will see the following screen when adding (or editing) an instructor:
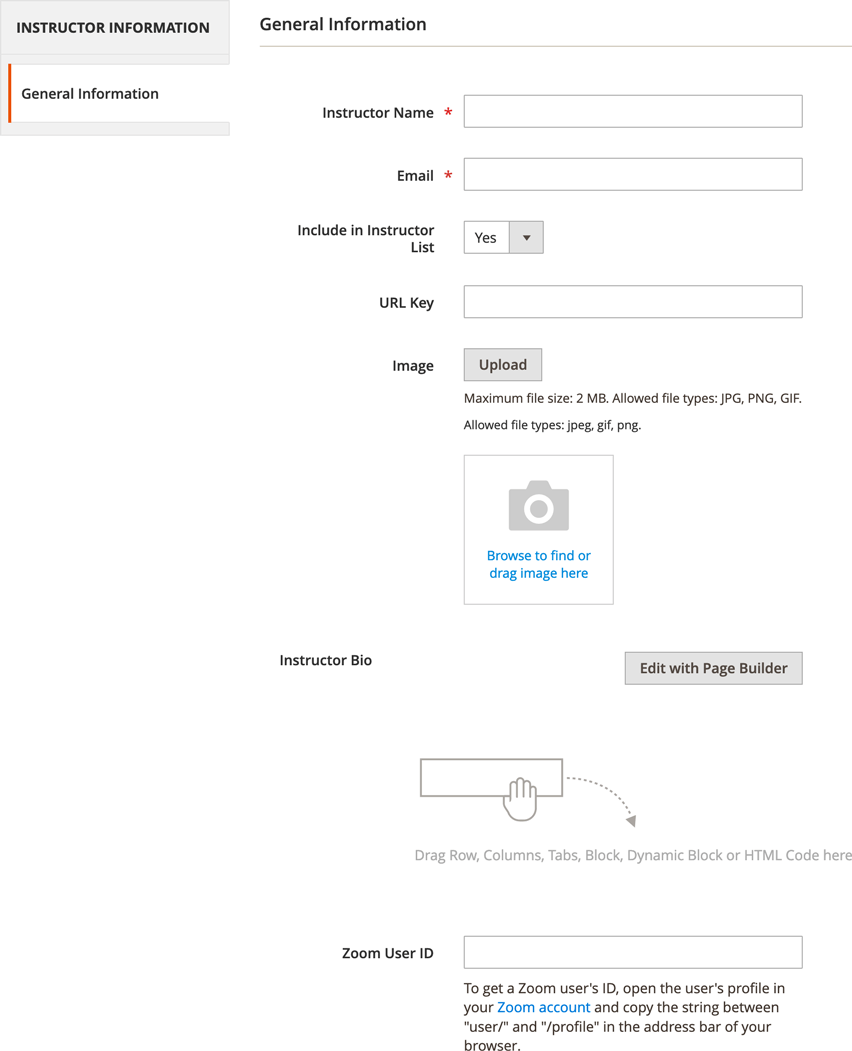
Instructor Name
This is where you enter the instructor's name.
This is where you enter the instructor's email address. If a valid email address is supplied and the emails are enabled, the instructor will receive the following emails, when applicable:
- Notifications about session changes and cancelations
- Class threshold notifications
- Zoom class hosting information
If an instructor does not have an email address or you don't know it, you can enter a placeholder email such as [email protected].
Instructor email addresses are only for backend use and are not made available to customers.
Include in Instructor List
You can exclude an instructor from the Instructor List by setting this to No.
URL Key
If a URL Key is supplied, a page will be created for the instructor which will show the instructor's Name, Image (if provided), and Bio (if provided) above a listing of all classes and events the instructor currently offers.
The value should be in standard URL format, consisting only of letters, numbers and dashes (-) or underscores (_). The URL of the instructor's page will be structured as domain.com/instructor/{URL_Key}/, so make sure each URL Key is unique.
Image
You can optionally upload an image of the instructor. If provided, it will be shown on the instructor's page and in the Instructors tab.
Instructor Bio
You can optionally provide a brief bio for the instructor. If provided, it will be included on the instructor's page and in the Instructors tab.
Zoom User ID
This setting is only used for instructors who are leading Zoom sessions using the Class Manager Zoom integration. Please see Assign Zoom host accounts to instructors for more details.
Instructor Pages
Instructor pages are auto-generated using the Instructor Name, Image, and Bio information you supply along with a listing of the classes and events currently offered by that instructor. The URL of the instructor's page will be domain.com/instructor/{URL_Key}/.
If no URL Key is supplied, then the instructor will not have an instructor page.
Instructor List
We recommend, for both SEO and UX purposes, that you create a page listing all of your instructors. Event Management provides an easy way to do this: just create a new CMS page and paste the following code into the Content section where you want the list of instructors to appear:
{{block class="staylime/classmanager\Block\InstructorList"}}
With this code inserted, you'll have a list like this on your page:

By default, all instructors are listed along with the number of classes or events they currently offer. If you'd like to hide instructors who are not currently offering sessions, you can disable Include instructors with no sessions available on Instructors page in Event Management configuration.
Additionally, as of version 2.1.0, you can hide individual instructors from the Instructor List by setting the Include in Instructor List to No. This will hide the instructor regardless of other settings. Please note that the Instructor Page will still exist and may be linked to elsewhere unless you also remove the URL Key for the instructor.
If no URL Key is supplied for an instructor, then the instructor's name will not be linked to an instructor page.

Instructors Tab
If enabled in the configuration, an Instructors tab will be shown on all class and event product pages showing the instructor's name, image, and bio with a link to their instructor page. If there are different instructors leading different sessions of the same class or event, they will all be included in the tab in alphabetical order. If no image or bio is supplied for an instructor then just their name and a link to their page will be shown.
Reports
Customer classes report
Event Management / Reports / Customer classes
The Customer Classes grid can be accessed from the main Event Management menu and allows you to look up class and event registrations by customer.

You can filter by Customer ID, Customer Name, Customer Email, Customer Phone, Class Location, Class Name, Order ID, Order Date, Order Status, Item Total and Purchase Location. The Class Date(s) (dates and times) column is also included but is not filterable. The Order ID column links to the order for easy reference.
You can also print the report or export it as a CSV for further inspection.
Purchase location report
Event Management / Reports / Purchase Location
The Purchase Location grid can be accessed from the main Event Management menu and allows you to look up where class and event registrations were purchased. If they were purchased online by the customer the Purchase Location column will show Customer; if they were purchased by an employee or other sales representative on behalf of the customer, the Purchase Location column will show the first and last name of the account which was used to purchase it.

The grid includes the filterable columns Purchase Location, Class Location, Class Name, Order Date, Item Total, Payment Method, and Order ID. The Class Detail (dates and times) column is also included but is not filterable. The Order ID column links to the order for easy reference.
You can also print the report or export it as a CSV for further inspection.
Surveys
Survey Forms (Backend)
The Survey Forms grid will list your existing survey forms and can be accessed from the main Class Manager menu. From the grid you can edit existing surveys, change the default survey, and delete surveys (as long as the one you are deleting is not set as the default).
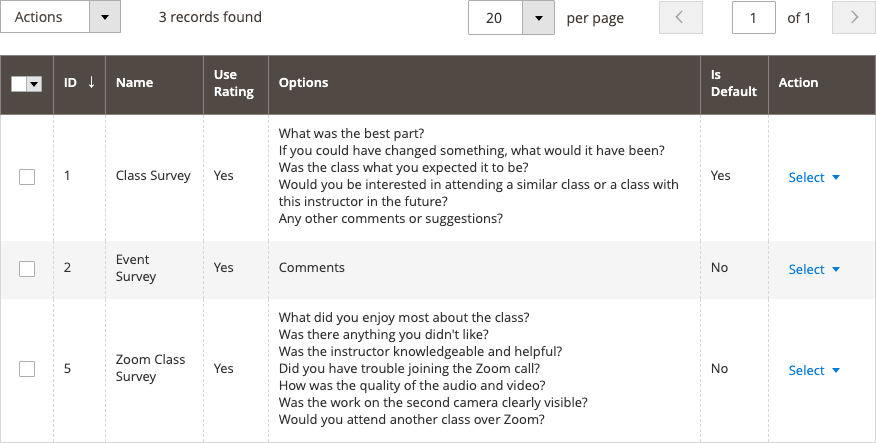
Creating & Editing Surveys
To create a new survey, press the "Add New Survey" button at the top of the Survey Forms page. To edit a survey, choose "Edit" under the "Select" menu for the survey you want to edit.
General Tab
Under the General tab, you will set the following options:
Survey Name- This will be shown at the top of the survey form pageDescription- This text will be shown underneath the session details on the survey form page
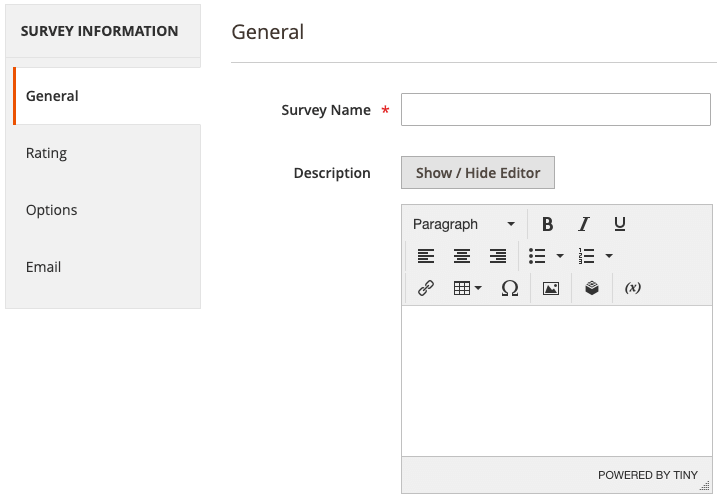
Rating Tab
Under the Rating tab, you can enable the rating option for your survey (disabled by default). This will present radio buttons to your customers to select a rating on a scale of 1-5. If desired, you can change the default text that accompanies the rating field. The scale (1-5) is not customizable.
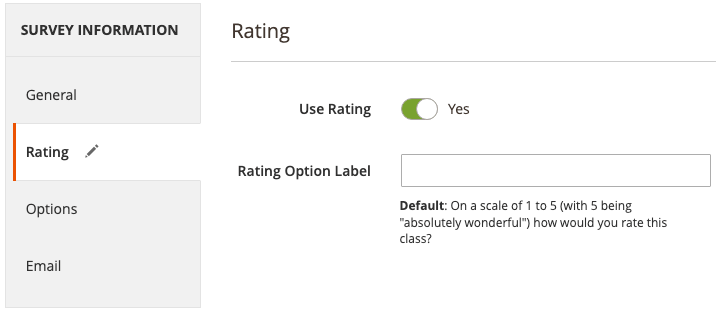
Options Tab
Under the Options tab, you can add and customize the fields in your survey form. You can add as many options as you like.
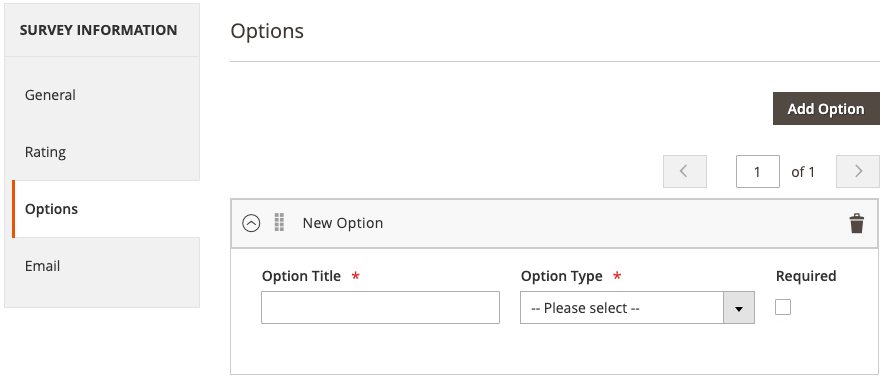
Press the "Add Option" button to add a new option. For each option you can specify the Option Title, Option Type, and whether it's Required or not for the form to be submitted.
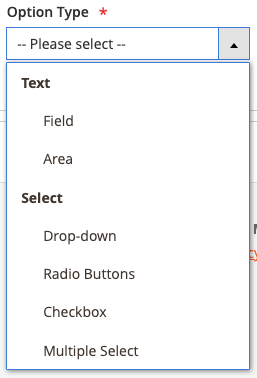
You have the following Option Types to choose from:
- Text Field — A single-line text field for short free-form answers
- Text Area — A multi-line, wrapping text field for longer free-form answers
- Drop-Down — A drop-down menu of choices (only one selection can be made)
- Radio Buttons — Radio button choices (only one selection can be made)
- Checkbox — Checkbox choices (multiple selections can be made)
- Multiple Select — A drop-down menu of choices (multiple selections can be made)
For all of the "Select"-type fields, you will be able to add values to correspond with the available choices.
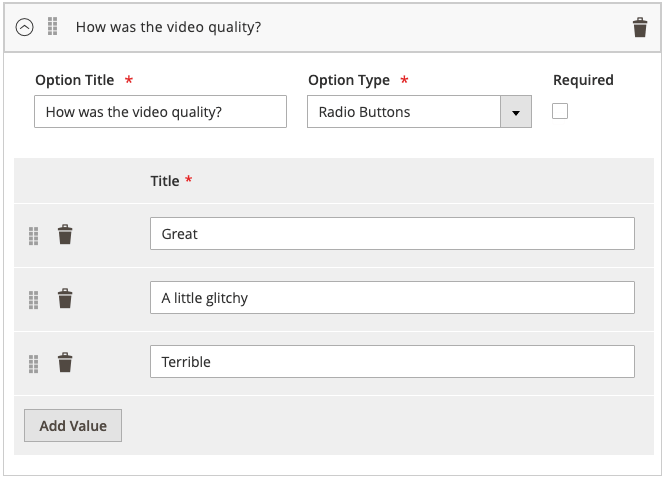
If you have multiple form options, you can rearrange them by dragging the handle icon Handle icon. You can delete an option by pressing the trash icon Trash icon. The same can be done with the option values.
Email Tab
There is a customizable section in the survey email template that allows you to customize your emails according to which survey is being sent. You can set the content for this customizable section under the Email tab. This content will be inserted wherever you place the %survey_email_text% variable in your email template.

Setting the Default Survey
Once you've saved the survey form, there are a few different ways you can set it to be the default.
- In the "Surveys" section of the extension configuration settings there is an option to select the default survey.
- When you're editing an existing survey you can press the "Set as Default" link at the top of the page.
- On the Survey Forms grid you can select "Set as Default" under the "Select" menu.
Using a Survey Other Than the Default
Survey selection is done when adding or editing sessions. If you'd like to send a survey other than the default, just select an alternate survey in the session settings.

Survey Forms (Frontend)
Once a class or event has ended (and the delay time as specified in the extension configuration has passed), the registrants (who have active registrations) will receive an email urging them to fill out a survey for the session they attended. To encourage honest feedback, surveys are designed to be anonymous, but if you'd like to collect customer contact information in order to follow up with them, you can always add the appropriate (optional) fields.
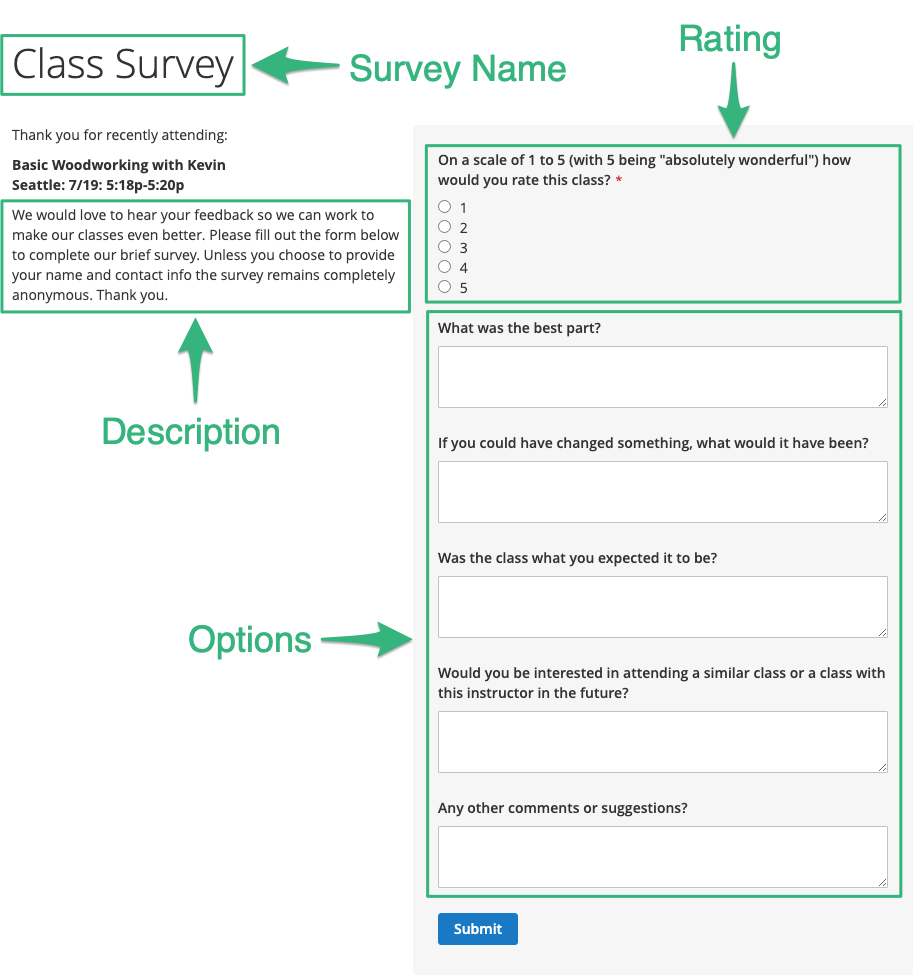
A customer can only submit a survey form once for each session they attend. Once they've submitted it for a session they will not be able to resubmit or change their response.
Survey Email
Just like other Event Management emails, you can customize the email that's sent out to session attendees under Event Management > Configuration > Email Templates. You can load the default template and then edit it, or you can insert the variable {{var survey_email_text |raw}} into an existing custom template where you want the survey-specific content to be displayed.
Tip: Make sure the surrounding email content will not be redundant when the survey-specific content gets inserted.
You can choose not to include the survey-specific content and just send the same email for all surveys. The link to the correct survey will be included even if the custom text block is not.
If you create a new custom email template, be sure to select that template in the "Surveys" section of the extension configuration settings.

Survey Responses
The Survey Responses grid can be accessed from the main Event Management menu. This grid will show you all responses to your surveys. The responses can be filtered and sorted by ID, Fill Date, Survey ID, SKU, Class Title, Session ID, Instructor, Location, Rating, and Survey Name. The grid also shows the responses to your survey questions.
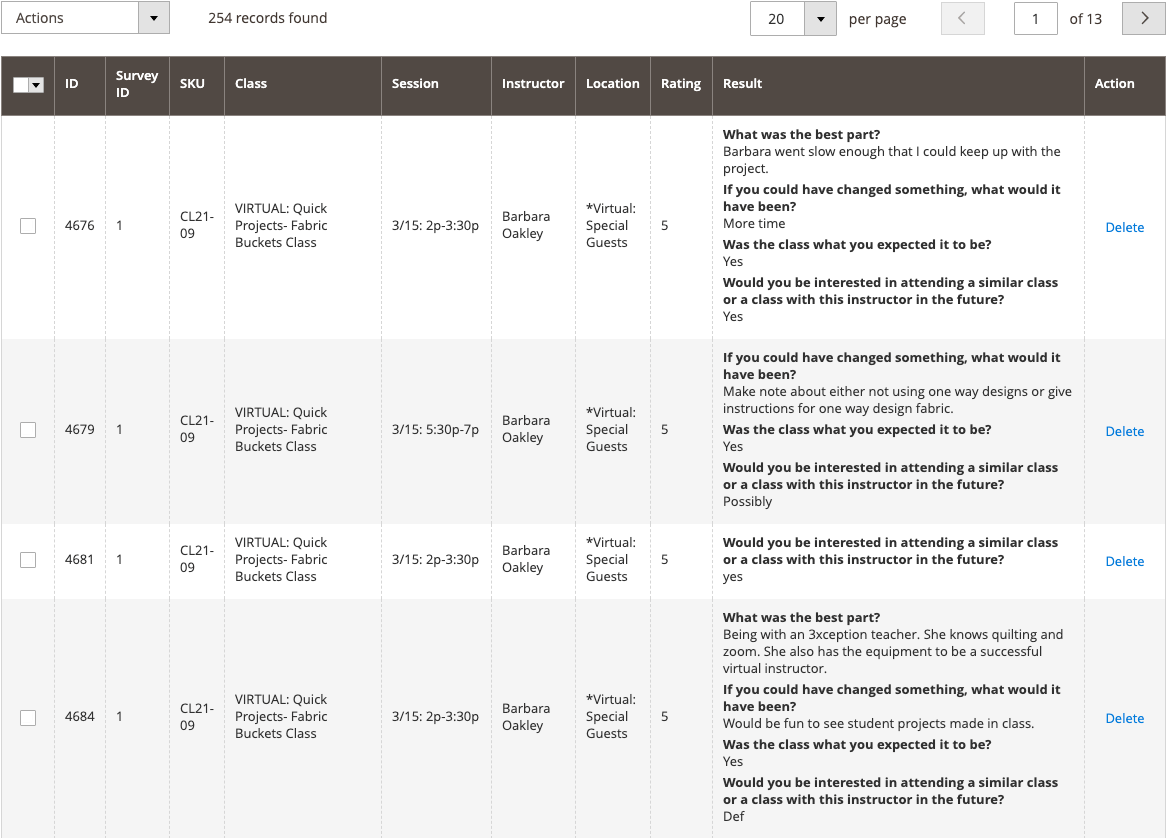
Survey Configuration
Documentation on survey configuration options can be found on the Configuration page.
Changelog
Releases
2.6.1 (2024-11-14)
- FullCalendar JS upgraded for Hyvä compatibility and huge performance improvements across all themes
2.5.6 (2024-11-01)
- Fixed incorrect product count on PLP when filtering active sessions
2.5.5 (2024-09-16)
- Fixed PageBuilder issues related to instructor CMS content
- Fixed an issue related to updating a session’s location or instructor
2.5.4 (2024-08-20)
- Compatible with Hyvä 1.3.7. Please also upgrade your Hyvä module
2.5.1 (2024-05-02)
- Compatible with Magento 2.4.7
- Fixed a minor issue with PHP 8.2
2.5.0 (2024-04-04)
- Added an option to require customer account email verification (using Magento native code) – enable it to improve privacy and security!
- Fixed missing details and visible code in session change emails
- Fixed ajax login issue
2.4.1 (2024-02-16)
- Fix for registrations not being activated for free classes when auto-generation of invoices is disabled
2.4.0 (2024-02-01)
- Hyva compatibility module release
- Add Email Registrants button to rosters to quickly copy registrant emails
- Improved timezone support in session dates
2.3.0 (2023-11-03)
- Fixed issue preventing class products from being reordered from previous order
- Improved multi-store compatibility of My Classes page and Classes dropdown
- Added ACL permission setting for viewing customers' Contact Preferences tab
- Minor backend UX improvements
2.2.0 (2023-08-14)
- Added admin visibility and management of customer opt-out selections
- Registration is now canceled when credit memo is issued for $0 order
2.1.1 (2023-07-12)
- Fixed incorrect session times in emails (Magento 2.4.6)
- Improved legibility of session dates and times in emails
- Emails for missing sessions or registrations are now cleared from queue
2.1.0 (2023-06-27)
- Added ability to display a customizable "Special Notice" at the top of all class pages
- Added list of Zoom User IDs to top of Instructors grid for easy assignment
- Added ability to control which instructors are listed on Instructors page
- Added address and phone number of class location to My Classes page
- Added order comments for all customer-facing Class Manager emails
- Added Fill Date column to Survey Responses grid
- Added total number of seats to header of Registrations grid
- Added session instructor's name on survey form page
- Added reCAPTCHA to "quick login" form for wait lists (when enabled for frontend forms)
- Fixed a bug preventing scheduled emails from being sent
- Fixed an error when survey form is submitted twice
- Fixed a "wrong column" error in Adobe Commerce
2.0.1 (2023-06-16)
- Fixed an error when displaying confirmation of wait list signup on PDP
2.0.0 (2023-05-31)
- GraphQL added as separate module (works with CM 1.11.0+)
- Zoom authentication method migrated from JWT App to Server-to-Server OAuth ( requires new Zoom API authentication credentials — more info )
1.12.0 (2023-04-21)
- Added multi-store support
- Fixed an issue where product imports fail if class reservation products are included
- Fixed PDP display issue related to negative-value price adjustments
1.11.0 (2022-12-08)
- Added ability to specify survey when importing sessions - more info (
survey_idcolumn must be added to session import CSV) - Improvements to frontend session loading UI on PDP
- Fixed issue with Add to Calendar links when location phone number is not provided
- Minor backend UI improvements
1.10.0 (2022-10-06)
- Added new
AttendedandNo-Showregistration statuses - Added option to send surveys only to those with
Attendedregistration status - Default values for importing sessions are now also used when creating sessions manually
- Additional unit test coverage
- Fixed missing price in mini cart
- Fixed bulk editing of roster entries
1.9.0 (2022-09-12)
- Added message about Zoom link availability to My Classes page
- Added Meeting ID above Meeting Password on My Classes page and in Zoom Join emails
- Added Payment Method column to to Purchase Location report
- Fixed bugs when exporting Purchase Location report
- Fixed variable type mismatch error during initial installation
- Minor backend UX improvements
1.8.0 (2022-08-01)
- Added the ability to include links to product downloads in Class Manager emails - more info ( requires MageWorx Product Attachments extension, may require updates to custom email templates)
- Added the ability to select multiple values when filtering by Order Status and Store on Registrations grid
- Refactored code to remove deprecated Sort Order field from sessions - more info (
sort_ordercolumn must be removed from session import CSV) - Fixed error on Registrations grid when applied Store filter has no results
- Fixed empty blue box showing in email templates when Add to Calendar links are disabled ( may require updates to custom email templates)
1.7.1 (2022-07-18)
- Added Order Status column to Registrations grid
1.7.0 (2022-06-20)
- Compatible with Magento 2.4.4 and PHP 8.1
1.6.1 (2022-06-13)
- Implemented declarative schema (full backup recommended before upgrade due to numerous changes affecting install and upgrade scripts)
- Major improvements to the Classes dropdown panel in the header
- Fixed styling of class title on change alert emails (may require updates to custom email template)
- Fixed a bug where change alert emails may be sent for imported sessions when no changes were made
- Fixed an issue where registration form fields would not auto-fill after logging in
1.6.0 (2022-05-06)
- Added the ability for customers to opt-out of specific Class Manager emails (we're laying the groundwork for adding SMS text message capability!) (may require updates to language files)
- Fixed missing CSS in email templates (may require updates to custom email templates)
1.5.0 (2022-03-12)
- Added basic wish list support (may require customization to work with custom or third-party themes)
- Improved translation support (may require updates to custom email templates)
- Added
#product-reservation-formID to reservation form element so it can be linked to directly - Added ability to select multiple values at once for back end grid filters
- Fixed an issue where registration form fields would not auto-fill immediately after logging in (Magento bug)
- Now storing iCal files in
var/classmanagerinstead ofvar
1.4.0 (2022-01-28)
- Added support for i18n translation files
- Updated unit tests to work with PHPUnit 9
- Fixed iCal display of multi-date sessions
- Minor backend UX improvements
1.3.0 (2022-01-10)
- Upgraded iCal library dependency to one that supports PHP 8 (
liliumdev/icalendar—>eluceo/ical) - If "add to calendar" links are enabled you will need to be running PHP 7.4 or higher
- Added message to iCal files regarding join links for Zoom classes
- Added a button to flush the email queue, if you're into that sort of thing (we don't recommend it)
1.2.9 (2021-11-18)
- Fixed a bug where REST API requests would fail if storeview with name default did not exist
1.2.8 (2021-11-09)
- Made small changes in ACL and email templates
1.2.7 (2021-09-27)
- Fixed JS error on the Survey form filling in the Firefox
- Fixed a routing for the "Save Instructor" button on the Instuctor Edit Form
- Added delete confirmation messages to Locations, Instructors and Survey Responses grids
1.2.6 (2021-09-06)
- Added bulk delete action in Sessions grid
- Changed rules in the online meeting`s delete action
- Changed email templates
- Fixed sort direction for list of Instructors in admin
- Changed default names of CSV export files
- Made UI and text changes in Config page
1.2.5 (2021-08-02)
- Added the Class Threshold feature
1.2.4 (2021-07-23)
- Added "Survey" column to Sessions grid which shows the Survey name
- Added Survey form ID next to Survey name in dropdown in Session editing panel
- Added confirmation message before deleting Surveys on the Survey Forms grid
- Made minor content changes in admin
- Fixed CSV export of Survey Responses
- Added a sample CSV file for Session Imports
- Hid Sort Order field for Sessions
- Renamed the title of "Price adjustment" column on Sessions grid to shorter form
- Added support for Magento Commerce
1.2.3 (2021-06-15)
- Added support for multiple Surveys
- Renamed the Survey delay setting on the Config page, and its value is now in hours instead of days
- Minor UI changes to Surveys in the backend
- Fixed an error which occured after saving more than one option or option values
- Fixed visibility of comment under Rating Option Label field
- Fixed a bug where a non-required option was saved as required during first save
- Made the “Include online classes on all calendar views” setting location-specific
- Fixed send time for Reminder and Survey emails in queue
- Introduced changes to the licensing functionality
1.2.2 (2021-05-31)
- Added indication that session has been canceled on My Classes page
- Zoom Status setting should now have a default value
- Changed address wording for Zoom sessions in emails
- Made the Action column visible on Rosters grid
- Renamed the “Hours Reservation Time” setting
- Removed the “Add to Calendar” link on My Classes page when registration status is canceled
- Setting "Require participants to have a Zoom account to attend" should now be disabled by default
- Session status is now checked prior to sending survey emails
- Cancel and change emails are now not sent if the session is already complete
- Removed period after month from date/time in emails when month name only has 3 letters
- Cursor is now `pointer` instead of `default` when hovering over Rosters grid rows
- Calendar's refresh button is no longer cut off in Safari
- Now all Zoom config options are hidden when Zoom integration is disabled
1.2.1 (2021-04-29)
- Unit test updates
- Code review and refactoring
- Added the ability to change/cancel emails for Instructors
- Added email confirmation field to the registration form
- Added additional indication for online locations in the calendar and in the session tab in the store admin
- Added comment text under email BCC field
- Fixed a bug where the resolve option caused a UI issue in surveys
1.2.0 (2021-03-22)
- Zoom API integration to enable online learning
- Enabled BCC for all module`s service emails
- Changed text in all module`s default email templates (session dates format)
- Fixed timezone when sending emails in queues
- "Add New Session" button no longer fails to expand the new session panel with pagination
- Upcoming Classes on My Classes page are now not moved to Recent Classes until the session is complete.
1.1.9 (2021-02-09)
- Fixed special tax class assigned to products with any type
1.1.8 (2021-02-01)
- Fixed tax class assignment for product with Class Reservation type
1.1.7 (2020-12-31)
- Added compatibility with Magento 2.4
- Added “Email Templates” to module`s admin menu
- Fixed HTML content in Survey email template
1.1.6 (2020-11-17)
- Fix for My Classes page when instructor is deleted
1.1.5 (2020-10-26)
- Improvements to roster printing
- Fixed an issue where reminder emails were sent for canceled registrations
- Fixed issues related to instructor display on frontend
- Fixed issues with instructor URL key
- Fixed unable to sort sessions by product name
- Fixed comma use in custom option prices
- Fixed issue with calendar tooltips
1.1.4 (2020-09-14)
- Restored the missing Advanced Inventory link for non-class products
- Status of unpaid reservations now changes from “Reserved” to “Canceled” once registration for session has expired
- Added “Special Events” column to Products grid
- Improvements to how the Special Event attribute is saved
- Thought you were seeing ghosts after deleting sessions? We got out our Proton Packs and improved the way Instructor and Location attributes are updated.
- Changed frontend visibility of Instructor and Location attributes to avoid repetitive filters in Layered Navigation
- Refactored the way class tallies are calculated on the Instructors page
- Fixed an issue in Magento 2.3.4 where CSV export radio button was duplicated
- Fixed an issue where products could not be updated in bulk from the Products grid when filtered by Instructor
- Fixed an issue where class items couldn't be edited or deleted from mini-cart
- Fixed an issue where adjustment price was calculated incorrectly when visited from category page
- Fixed an issue where cart changes could not be saved when only classes were present
- Fixed an issue with hover details on calendars
1.1.3 (2020-07-22)
- Fixed an issue where reminder emails were sometimes sent after a session was canceled
- Fixed a roster export issue when PHP short tags are not allowed
- Added customer notes to Wait Listed Classes section on My Classes page
- Added default CSS for unavailable session labels
- Changed title of “Classes” link in account header menu to “My Classes”
- Added CSS to visually separate supply list items section from the rest of the registration form
1.1.2 (2020-07-15)
- Fixed an issue were survey emails were sometimes sent for inactive sessions
- Phone number field on the waitlist form is now hidden if one is already saved in the customer’s account (to prevent confusion for employee waitlist registrations)
- Additional class names
actionandprimaryadded to Add to Calendar links, which will style them as buttons in the Luma theme (and other themes which support those class names)
1.1.1 (2020-07-13)
- Added a new “Customer Classes” grid showing class registrations by customer
- Changes and fixes to “Location Purchased" grid (now called “Purchase Location”)
- "Stores" menu group changed to “Reports” and now houses “Customer Classes” and “Purchase Location”
- Fixed issues related to Qty and Capacity filtering on Rosters grid
- Disabled editing of “Reserved Date” on rosters (changes were never saved anyway)
- Removed “#” column from Upcoming Classes and Wait Listed Classes tables on My Classes page
1.1.0 (2020-06-01)
- Added license key support
- Added “View Roster” links to orders in back end
- Changed label for config setting related to cart quantity adjustments
1.0.14 (2020-05-25)
- Improved support for calendar printing
- Added location name to meta title for filtered calendar pages
- Changed default text for empty sections on My Classes page
- Fixed issue setting Special Event attribute to “Yes” for new classes
- Fixed “Can’t check requested quantity for products without Source Items support” error
1.0.13 (2020-04-06)
- Added new email to notify customers of changes to a session’s date, time or location
- Improved compatibility with multi-store setups
- Added setting to control whether to add a link to the event calendar in the main menu
1.0.12 (2020-03-04)
- Fixed permissions issue when editing roster entries
- Added “add-to-calendar” CSS class name to iCal links in email templates
- Added the ability to customize supply list text
- Fixed “Select all” link for adding supply list items to cart
- Improvements to default configuration settings
- No customer groups selected by default for store accounts
1.0.11 (2020-01-29)
- Added configurable midpoint to “Capacity” column to turn bar yellow when over certain threshold
- Fixed media path error for instructor images
1.0.10 (2020-01-19)
- Fixed permissions issue when editing sessions from Sessions grid
- Removed Registration ID column from Survey Results grid to make survey submissions anonymous
1.0.9 (2020-01-07)
- Added “Add to Calendar” links (iCal format) to the My Classes page and registration & reminder emails so that customers can add classes to their calendar of choice (requires manual update of customized templates)
- Added “Capacity” column to Sessions and Rosters grids to visually indicate how full a class is
- Compatible with Magento 2.3.3
- Improved compatibility with older versions of the Porto theme
- Unit test updates
1.0.8 (2019-11-24)
- Registration status will now be active even if other items in order are pending shipping
- Added ability to export survey results to CSV (export can optionally be filtered)
- Canonical link meta tag added to Instructor pages
- Small improvements to admin menu and settings
- Unit test updates
- Additional unit tests added for new features
1.0.7 (2019-11-04)
- Fixed Instructor page router issue
1.0.6 (2019-10-23)
- Added Instructor pages
- Fixed an issue where deleted sessions would cause shopping cart errors
- Updated survey link hashing algorithm to be compatible with PHP Sodium (required by Magento 2.3.2)
- Added classes registered by stores/employees to customer’s Classes dropdown in header ribbon
- Fixed issues with the display of available sessions in IE
- Added extension version to CM settings
1.0.5 (2019-10-09)
- Added classes registered by stores/employees to customer’s My Classes page
- Added “Instructors” tab to class product pages
- Improved readability and usability of editable fields on Roster grid
- Added “Paid” column to Roster grid
- Fixed issues related to Class Location options in Layered Navigation
- Alphabetized list of instructors in back end
- Unit test updates
1.0.4 (2019-08-28)
- Added option to include custom options on wait list signup form
- Separated registered classes on My Classes page into “Upcoming Classes” and “Recent Classes”
- Modified CM email templates to improve responsiveness and readability (requires manual update of customized templates)
- Added column management to Survey Results grid
- Added links to open rosters from Sessions grid
- Removed auto-completion of registration form for store/employee accounts
- Fixed pagination bug on My Classes page
- Added optional “Email” field for Locations
- Added columns to Locations grid:
- Address
- Phone
- Added “URL Key” column to Instructors grid
- Made Instructors and Locations grids filterable
- Order comment added when registration confirmation email is sent
- Made “Status” column editable on Sessions grid
- Made survey “Rating” label editable
- Time zone fix for “Date Created” column in Sessions grid
- Made columns editable on Sessions, Locations and Instructors grids
- Unit test updates
1.0.3 (2019-08-05)
- Added ability to select multiple statuses when filtering Roster grid
- Added filterable “Instructors” column to Products grid
- Auto-select session on class page when only one is available
- Order comment added when registration status is changed on the roster
- Changed appearance of classes with 0 quantity on My Classes page
- Hid classes with 0 quantity from Classes dropdown in header ribbon
- Added white background to calendar events
- “Seats Left” value on rosters updates dynamically with status or quantity changes
- Linked class title in CM emails to class page on website (requires manual update of customized templates)
- Fixed sorting issue on quantity columns in Registrations grid
- Changed “Get on the wait list” text to “Add me to the wait list”
- Request date added for wait list entries
- Moved customer wait list notes to “Customer Info” column on rosters
- Added columns to Sessions grid:
- Date Created
- Seats Available
- Session Notes
- Sort Order
- Price Adjustment
1.0.2 (2019-06-21)
- Ensured compatibility with Magento 2.3.2
- Fixed an error that occurred in new installations when order invoice is saved, changing registration status
1.0.1 (2019-06-20)
- Added support for PHP 7.2
1.0.0 (2019-06-20)
- Initial Release
